
By Suneha
GuideYou might often encounter large uncompressed files in your documents which require you to reduce the size so that you can share them with your colleagues, peers, and friends. This is always an extra hassle to deal with but with newer technologies and tools, you can reduce photo size in KB easily with your devices. In today’s blog, we will show you how to reduce photo size in KB without compromising on quality.
Reducing photo size in KB is very beneficial because it allows easy sharing of files and increases trust with business partners. There are many ways to reduce the size of your photos; by altering the resolution, adjusting the photo size, and compressing your photos.
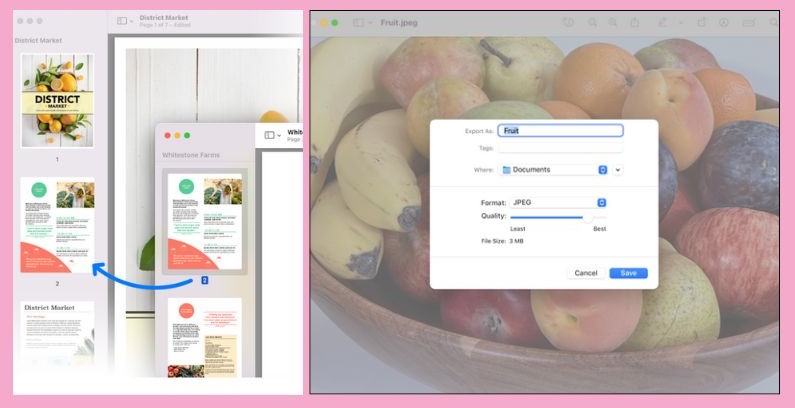
For Mac users, the easiest way to resize any photo is by using the Preview App which is pre-installed in your Mac devices. Here are the steps you should follow to reduce the size of your photo in KB.
Step 1: Open the Preview App on your Mac devices. Upload the image or simply select the photo you want to reduce the size of and then right-click it and open with ‘Preview’.
Step 2: Click on the tools section at the top and select the ‘Adjust Size’ button.
Step 3: Now you can adjust the height and width of your image. Once you have reduced the size, click on ‘OK’.
Step 4: Click on ‘File’ from the top of the toolbar and select ‘Save’ to save your modified version of the photo with a size reduction.
There are three ways you can reduce the photo size in KB using Windows. These are the Photos App, Paint App, and Microsoft Word.
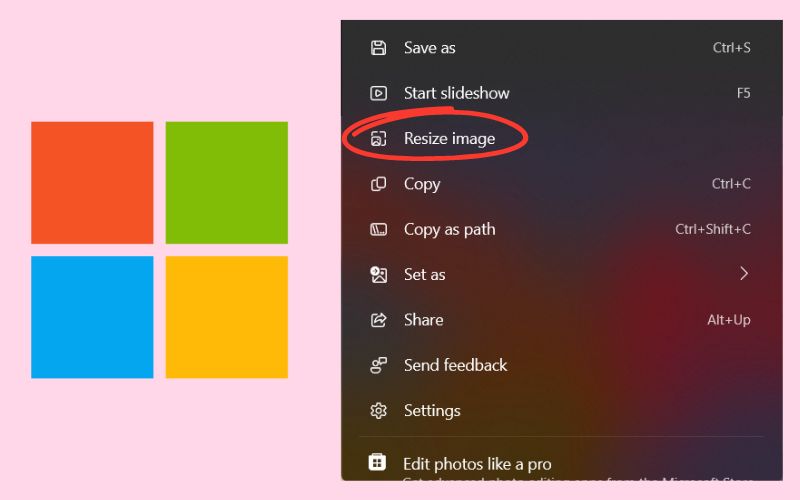
Here are the steps you can follow to reduce the photo size in the Photos App.
Step 1: Open the photo you want to reduce the image size of.
Step 2: At the top of the toolbar, click on the three dots.
Step 3: A drop-down menu will appear. Locate the ‘Resize Image’ button and click on it. You can reduce the photo size in pixels or percentages.
Step 4: Input the size you want your image to resize to.
Step 5: Click on ‘Save.’
Follow these steps on how to reduce photo size in KB in Windows using the Paint App.
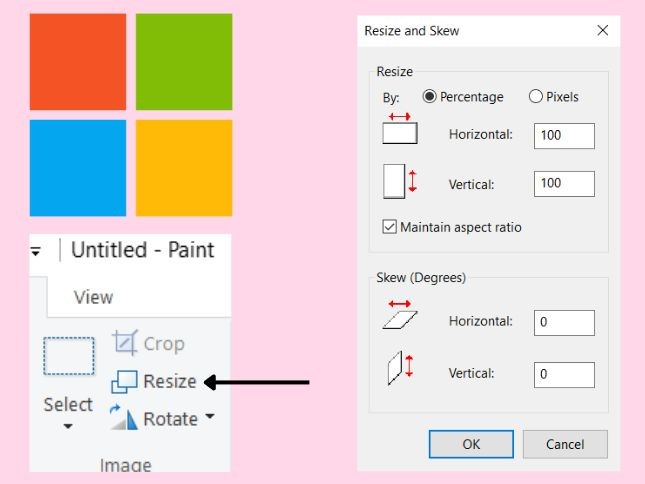
Step 1: Open the Paint App and select the photo you want to reduce the size of.
Step 2: Click on ‘Edit’ and then select the ‘Resize’ button.
Step 3: Specify the change in pixels or percentage.
Step 4: Click ‘OK’ once you are done and then Save the photo.
Here is how you can reduce the photo size in KB using Microsoft Word.
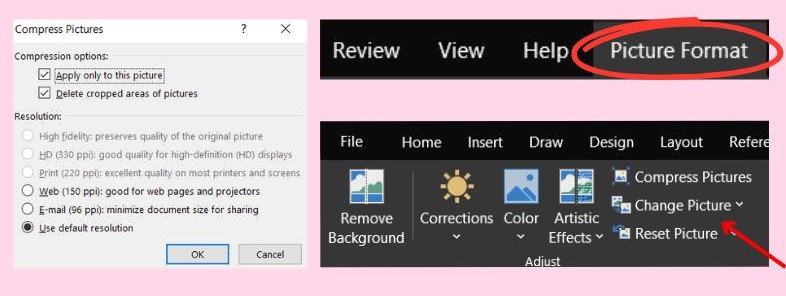
Step 1: Open Microsoft Word.
Step 2: Select the picture(s) that you want to reduce the size of.
Step 3: Click on the uploaded picture and head to the ‘Picture Format’ Tab at the top.
Step 4: Click on ‘Compress Pictures.’ You can choose from a variety of options depending on your needs like Web, Email, HD, etc.
Step 5: Click on ‘OK’ to reduce the resolution. If the reduction causes the image to become unreadable, click on undo and select a large DPI.
Also, check out: How to Add Stickers to Photos on Your Phone
Suppose you are in a hurry and cannot access your laptop/PC to reduce a photo size. Your Android device can be a huge help in this case. Here are 4 ways you can reduce photo size in kb using your Android Devices.
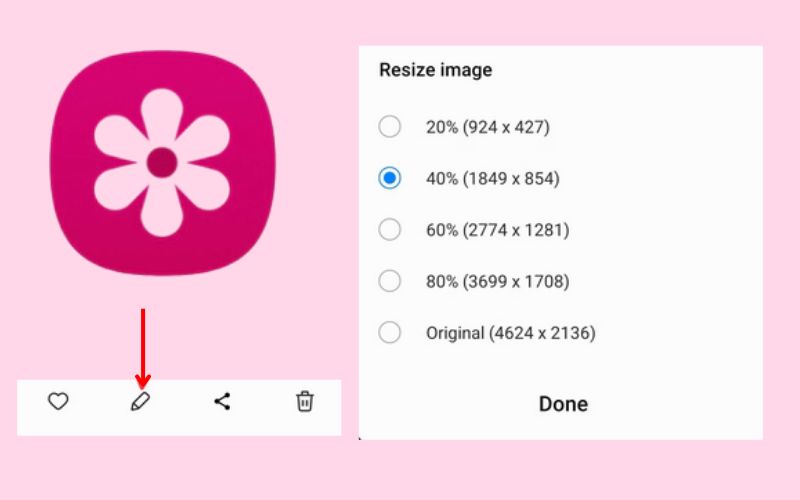
For all Samsung users; you can easily resize your photos using the Gallery App on your phone.
Step 1: Open the Gallery App on Samsung.
Step 2: Select a photo you want to resize and click on the Edit button (looks like a pencil at the bottom of your screen).
Step 3: Click on more options (the three dots in the top right corner) and then select ‘Resize.’
Step 4: A bunch of options will be given to you and you can choose one which you deem is satisfactory.
Step 5: Once you are done, click on ‘Save.’
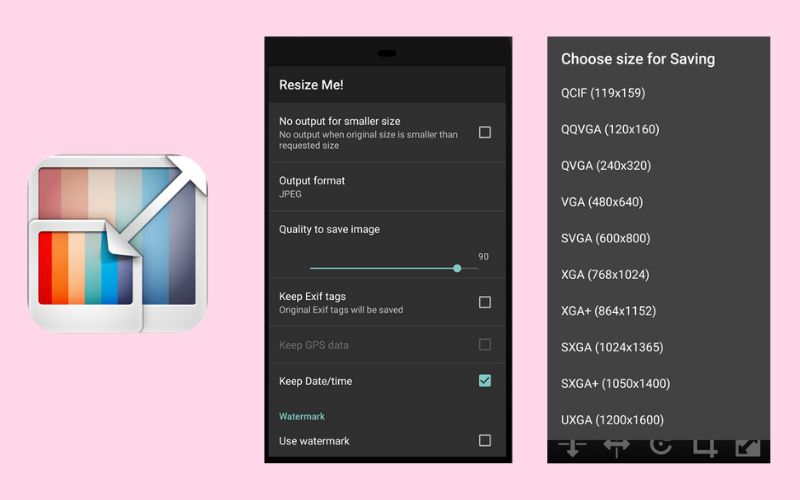
Resize Me is a decent photo size reducer application that is available for free on PlayStore. Here is how you can reduce the size of your pictures on Resize Me. It is compatible with PNG and JPG format pictures. For users using the free version of the application, you will need to see a bunch of ads to access the photo resizing tool. You can also resize multiple pictures at the same time to reduce time consumption when you are in a hurry.
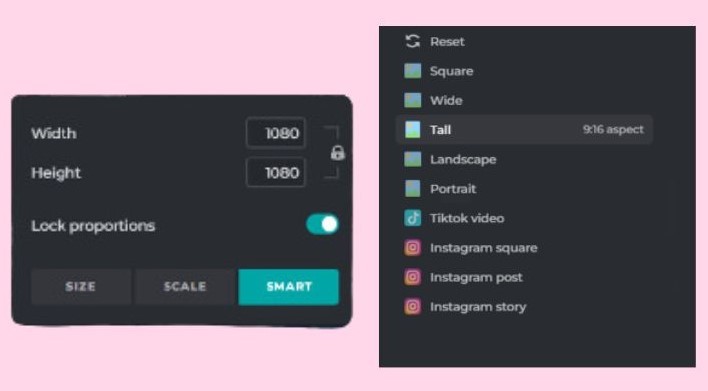
Pixlr is a great option to reduce the size of your photo in KB. It is pretty easy to use and here is how you can resize the photo size.
Step 1: Open Pixlr on your phone.
Step 2: Open Pixlr Editor and upload a photo you want to resize.
Step 3: Select the Image tab and click on ‘Smart Resize’ from the dropdown menu.
Step 4: Fill in the desired dimensions you want for your photo and then Save it. You can add a ‘Focal Point’ to indicate an area to prioritize and yield clear and high-resolution images.
Also, check out: How to Change Background Color on Instagram Story
You can reduce the size of your pictures by using the settings app on your iPhone. Here’s how you can use it.
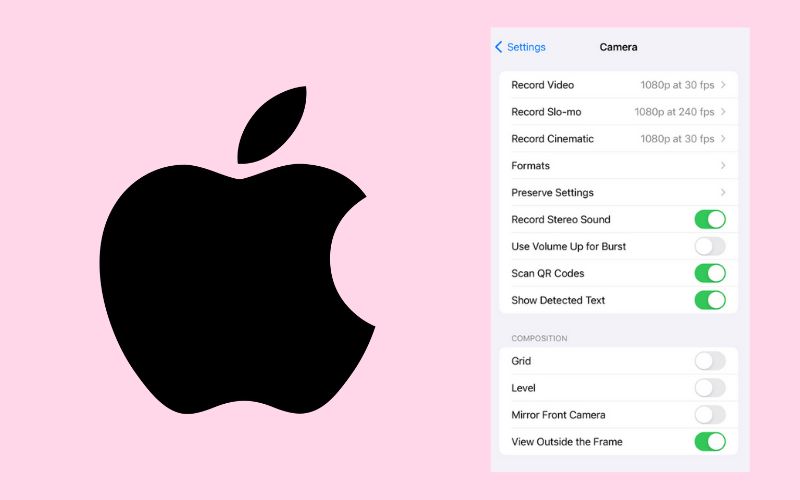
Step 1: Open Settings.
Step 2: Tap on ‘Camera’ and then click on ‘Formats.’
Step 3: Select ‘High Efficiency’ which gives the smallest size of the photo without reducing the quality of the picture.
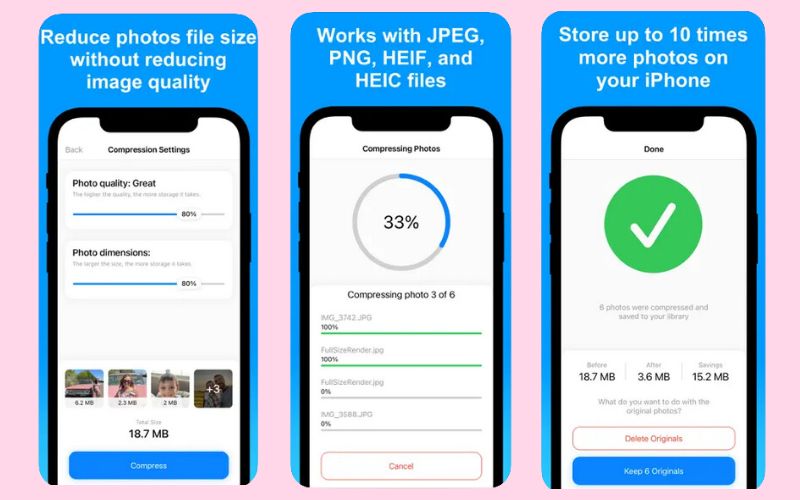
Here’s how you can use Compress Photos and Pictures to reduce the size of photos in KB.
Step 1: Open Compress Photos and Pictures on your iPhone.
Step 2: If you are new, you will have to give permission to the app to access your photos.
Step 3: Click on ‘Select Photos to Compress.’
Step 4: Upload the photos by scrolling through your gallery. You can compress three photos for free. If you have a pro, you can compress more in one go.
Step 5: After choosing the dimensions and quality, click on ‘Compress.’ You can additionally delete the original photos or keep them.
Step 6: Save the photo(s).
You might need to resize your photos in kb for any business meetings, presentations, or faster sharing of documents. Here are some of the reasons why compressing the size of an image can be helpful.
A photo with large dimensions can take a lot more time to load on your web page and make the site feel heavier. Resizing images to the optimum dimensions can help your web page load significantly faster and create a smoother experience. Additionally, smaller images use less bandwidth which is beneficial for mobile users.
Properly sized images are great for giving your pages a smoother and polished appearance which is very good for brand representation and customer satisfaction.
Resizing your photos helps in maintaining a consistent look. Having a picture with proper aspect ratios helps in preserving its integrity and helps maintain the aesthetic appearance.
We hope you liked the article on how to reduce photo size in kb. Resizing pictures is a great way to share files and important documents quickly without any hassles. It additionally helps create a smooth experience for users on web browsers as the sites do not feel heavy to use. If you like our articles, please feel free to share them with other enthusiasts.


