
By Arjun
How To'sThere are many reasons to invert a picture on iPhone. Despite its dramatic and interesting effects, you can also use it for many practical purposes, from enhanced image editing to layered image projection.
You can invert a picture on iPhone in many ways using the integrated photos function or using a third-party app to bring the same effects to your picture. In this article, we’ll explore the easiest and time effective ways to flip the colors of your pictures using an IOS device. Let’s get right in:
If you’re using an iOS device, iCloud Photos has some awesome photo-editing features. Surprisingly, however, there are not enough options to invert a picture on iPhone.
Therefore, in addition to iCloud Photos, you can use trusted third-party apps, such as Luminor, Lightroom, and Photo Express, to invert your favorite images. Let’s review each platform so you can choose which is best for you and feels more convenient.
If you're looking to make images black and white rather than the typical inversion, our article on how to make images black and white will help you with the same!
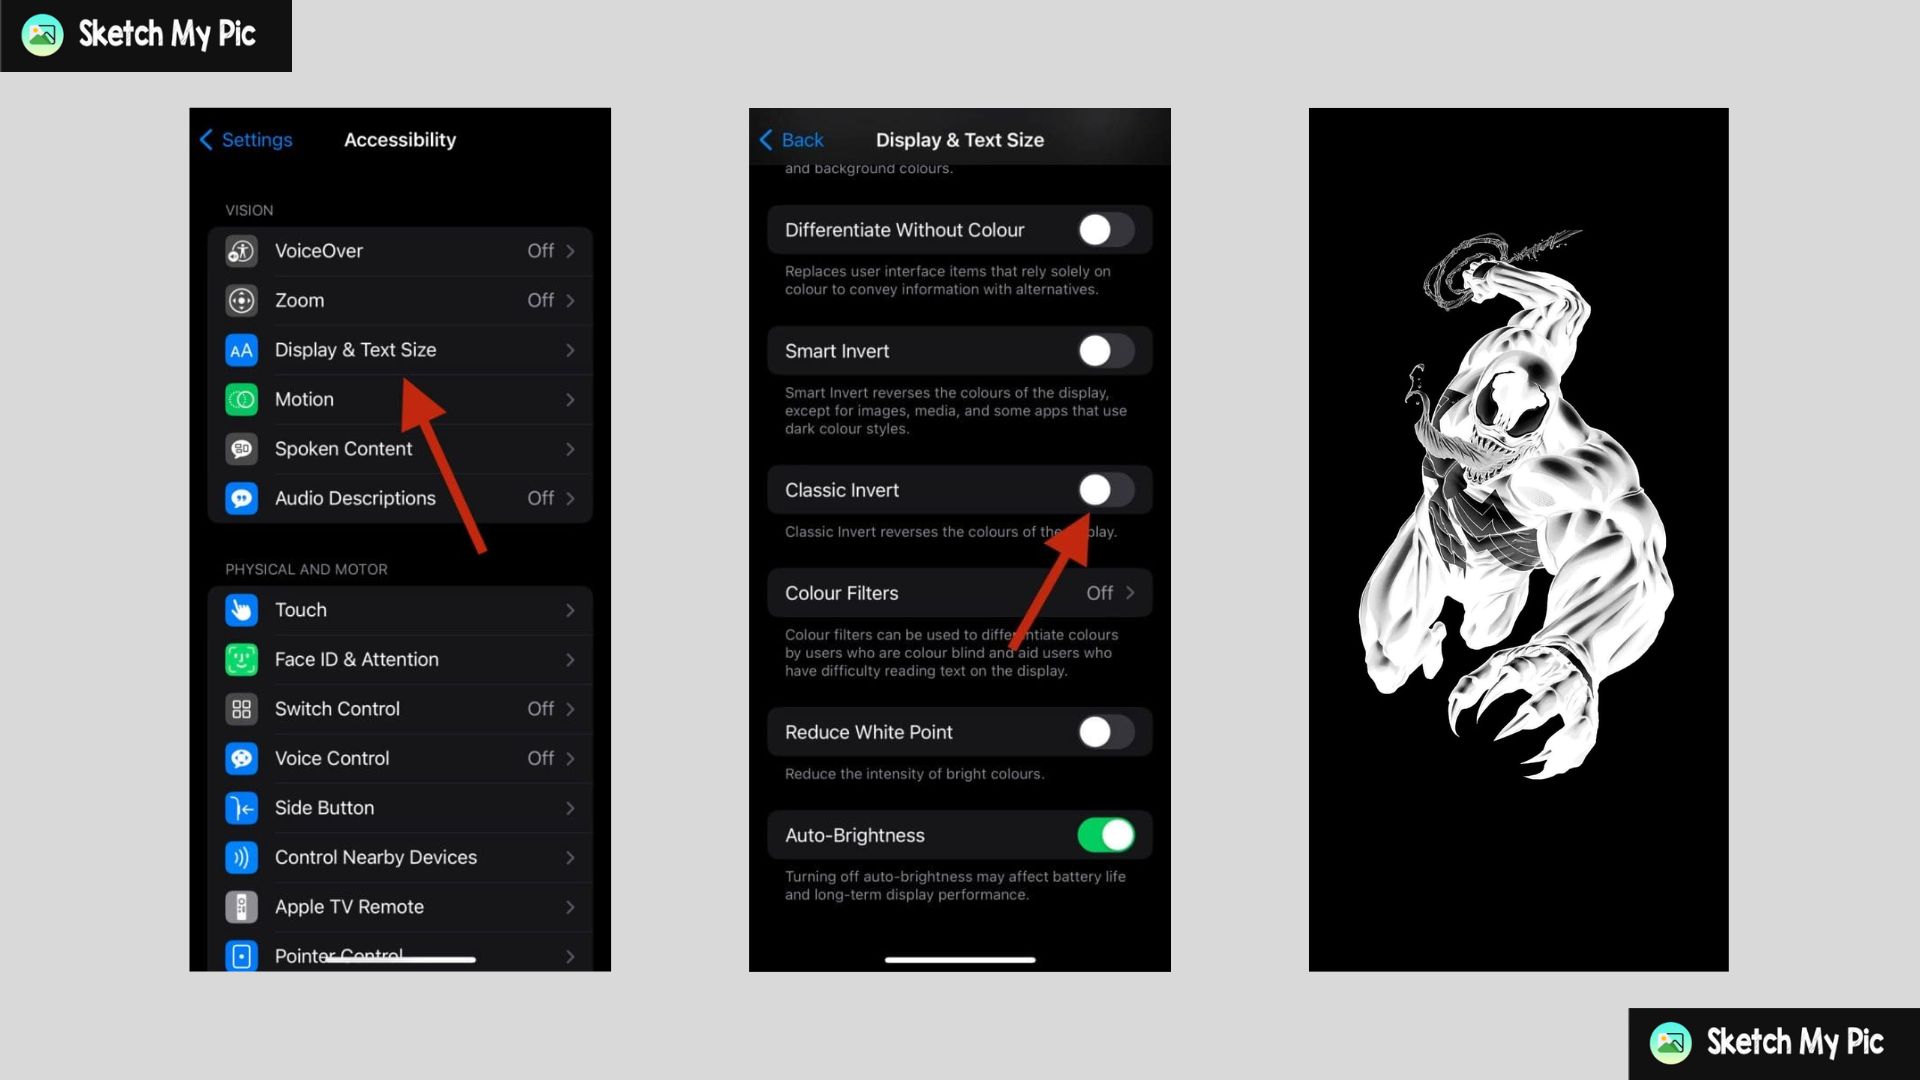
Besides many ways to invert a picture on your IOS device, the built-in iCloud Photos app is the quickest and easiest way. Here’s how:
After inverting your preferred images, you can turn off the inverted option by going back to your accessibility settings. Your now-inverted image will be on your iPhone’s gallery.
The most important feature of using third-party apps such as Lightroom is that you can freely adjust the level of inversion around your images according to your needs. These features are designed for the user’s advanced customization needs to manipulate images per the user’s purpose. Here’s how:
Photoshop Express is also the easiest option for inverting an image on your IOS device. Because of its direct inver option from the menu, you can hit a button, and your image will be inverted. Here’s how:
You’ve successfully inverted your image using all of the three effective options! If you're looking for effective AI tools for all your photo editing needs, our guide on finding the 10 Best AI Tool for Photo Editing will come very handy!
In this article, we’ve discussed how you can control your images by manipulating them using different tools and applications. If you need any help with this, feel free to contact us. We’d love to help you however we can. Happy editing!


