By Suneha
How To'sIn this blog, we present you a step-by-step tutorial on how to draw braids. Hair drawings can be a complex element to draw due to their tricky designs, complex shading, and contouring. However, with proper planning and execution, obtaining beautiful results can be simpler. Hair drawings beautify your portrait more and give a natural look to your sketches.
Braids look different in different types of hair. Wavy hair has different textures in comparison to curly hair, so the braids will look different. Due to this, you can play around and experiment with different styles to see what suits you best. So let's get started.
To draw braids, you will require certain drawing tools and materials.
1. Drawing and Sketching Pencils - Sketching pencils are used for creating initial outlines and guidelines. HB, 2B, 4B, and 6B pencils can be used for drawing and shading.
2. Drawing Paper and Drawing Board - You will require a drawing board and drawing paper to draw the braids. Ensure that you keep it on a flat surface, hence the drawing board.
3. Kneaded Rubber Eraser - Kneaded erasers are used by artists to avoid any damage to the paper while erasing. You can also use any other eraser.
4. Colored Pencils - Colored pencils can create depth and shadows for your braids. However, these are optional materials.
You can use any other materials for drawing braids, depending on your preferences. Drawing is different for every artist, so we recommend you use your preferred drawing materials as well.
In this section of the blog on how to draw braids, we will show you a step-by-step guide on how to draw braids. You can also use this tutorial to make any braid, like box or French braids. Without further ado, let's get into this easy tutorial on how to draw braids.
Step 1: Refer To Online Pictures or Videos
It is important to always refer to pictures before you get into any sketch. Referring to other pictures is a great way to create a mind map, which makes planning easier.
Step 2: Decide where you want to draw your braid on the paper
Gestures and proportions are an essential step in drawing French braids, box braids, or any other kind of braids. Consider where you would like to situate your braids on the piece of paper, as it makes it easier to make room for more compositions and additions to your braid sketch.
Step 3: Sketch in your guidelines
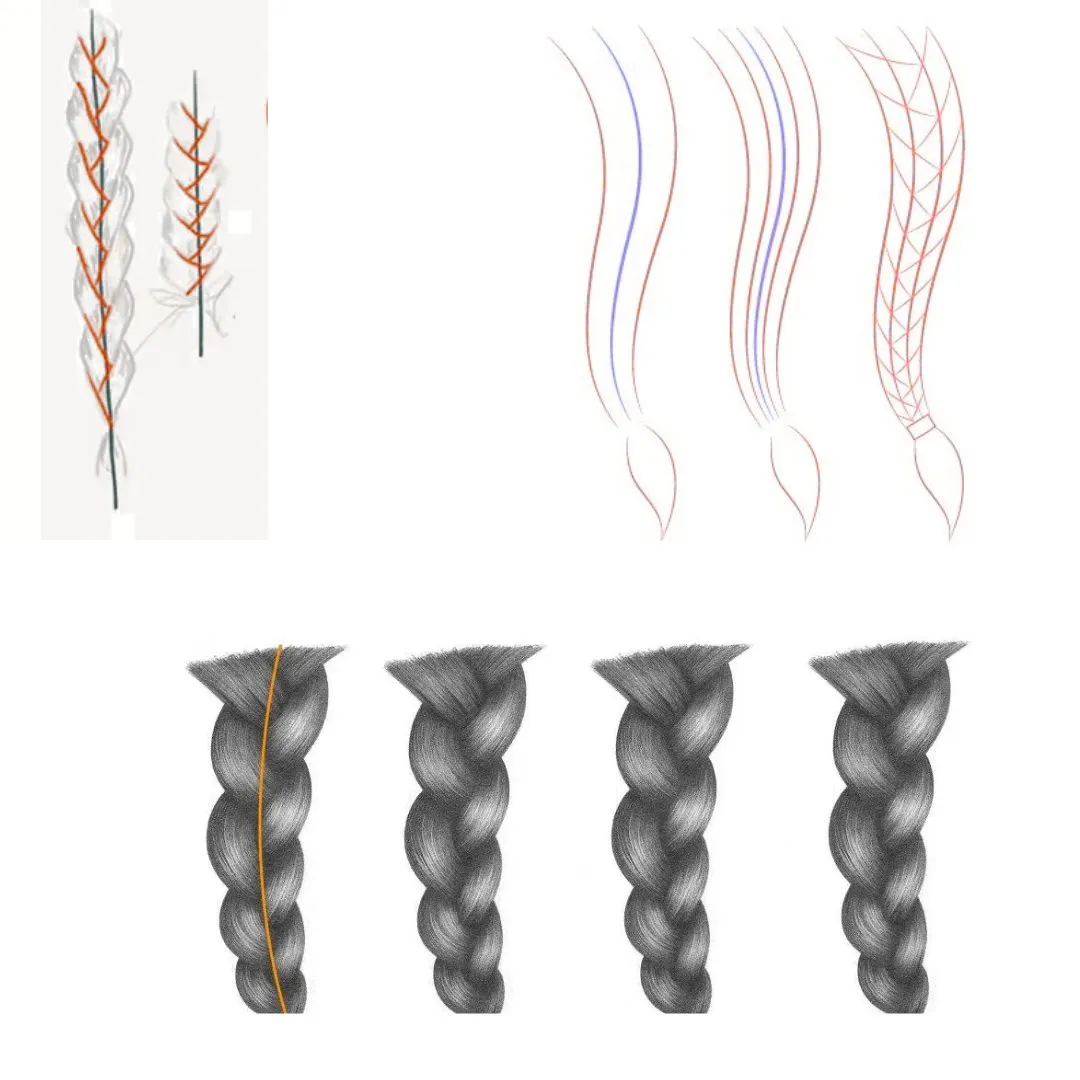
Using light and erasable uneven and curved lines, make the guideline for your braids. This basic line will show the motion of the braids. Even for a straight braid, a guideline is required. If the braid is slightly curving when falling at the end, make the line curvier towards the end to suggest that motion. We have given examples above.
Step 4: Draw the basic braid pattern
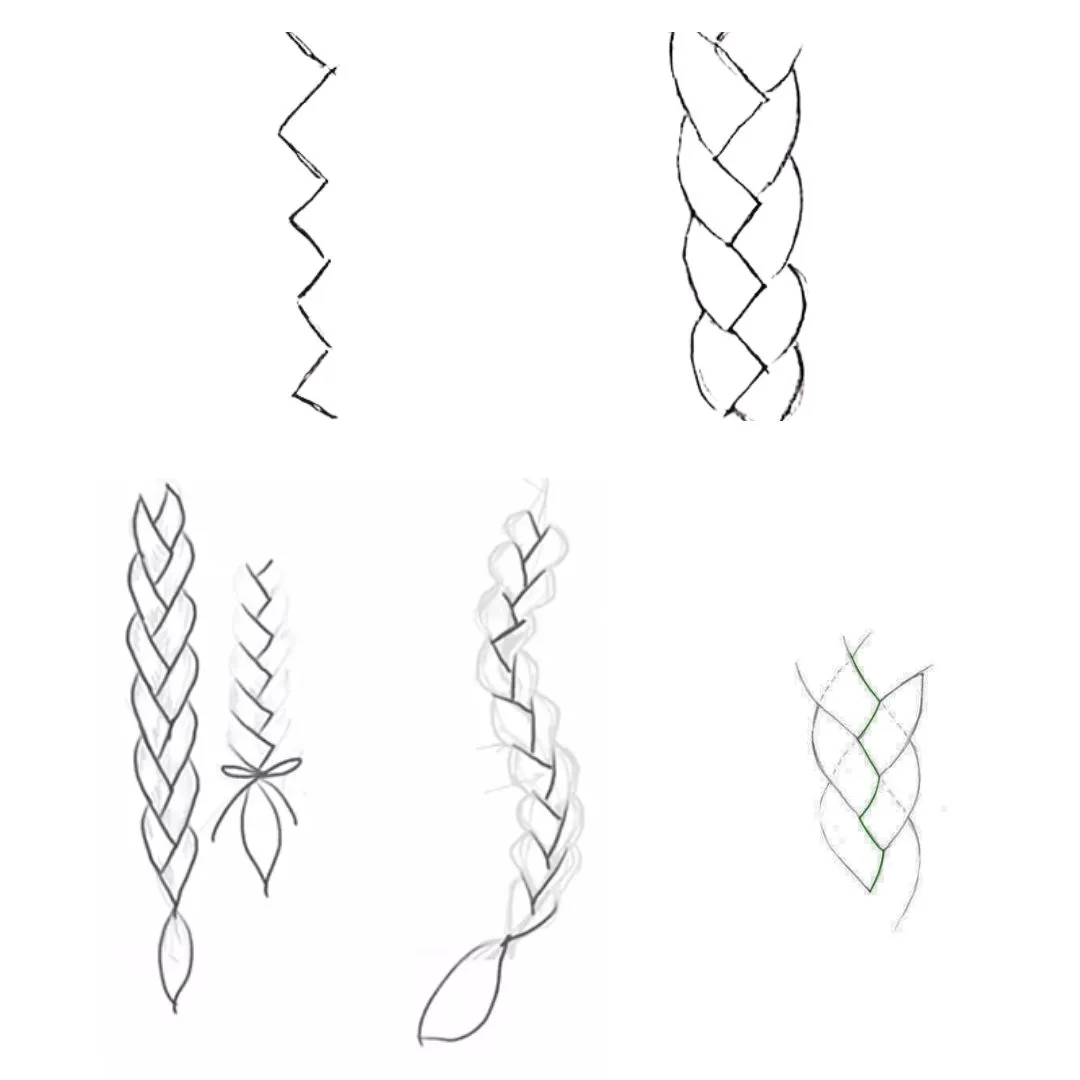
Create a basic shape that will depict the pattern of your braid(s) over your guideline. An easy way to make the pattern is to follow the concept of gestures and overlapping lines. Every line flows into another line, creating a flowy look. A braid has three or more lines to show its pattern. Since every hair strand is woven together, it creates an overlapping and flowy look. Another way you can achieve braid patterns is by using 'Y shapes' or zig-zag lines as your center point and connecting the ends of the 'Y' shapes with curved 'C' lines.
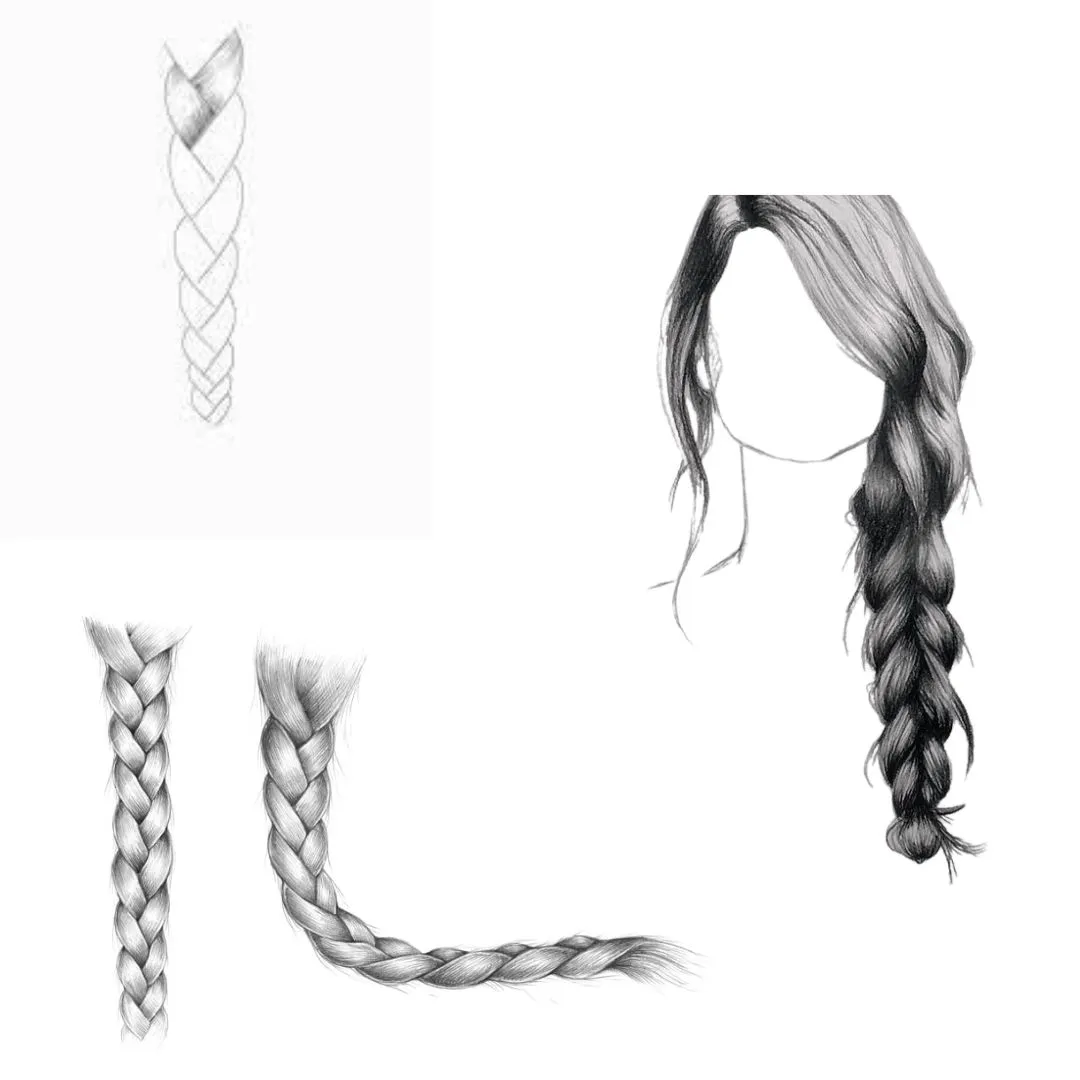
Step 5: Draw in the details
After making the basic pattern of your braid, fill in additional details of individual strands. You can also make light lines around the braid to show a few excess hairs.
Step 6: Draw the end of the braid
Make sure to draw the end of the braid. The hair will be pinched into a tight block where the hair tie is, creating a poofed appearance like the shape of a leaf but with volume.
Check out: How To Draw Hair
After making the basic sketch, start shading your braid to give it different dimensions and volume.
1. Start from the general details to the individual shades
An easy way to shade your braid is to start with the general shading of the braid. Start by applying lighter shades to the braid except for the highlights.
2. Use curved lines
When shading braids, use curved lines to create wavy and flowy hair.
3. Emphasize the shading on overlapping lines
Use heavier tones to shade the strands of hair that overlap with each other. Make sure to give the braid generous amounts of shading and contours to convey fullness and volume, including variations in which specific hairs curl away from the central line of the braids.
4. Lastly, be patient when shading your braid because shading braids is complex. Every hair type is different. For coarser hair, you will need deeper shadings than for thin hair. Practice will help you understand shadings and contours better. So, even if you make a mistake, do not give up!
Check out: How To Draw a Wolf
We hope this blog on how to draw braids was helpful to you. You can also check out other blogs on SketchMyPic and try out more easy tutorials on drawing and sketching.


