By Suneha
GuideAn integral part of photography is the element of bokeh or soft blur. While a camera has the necessary technology to create this effect seamlessly, an iPhone camera may not be able to. In today’s blog, we will guide you through different methods and techniques so that you can learn how to blur the background of a picture on iPhone.
A blurred background in your photo can help reduce the clutter and sharpness. It is a good tool to remove unwanted elements from your photos, for instance, removing pedestrians and tourists while taking a picture near a monument and many more. Here are three ways you can blur the background on an iPhone.
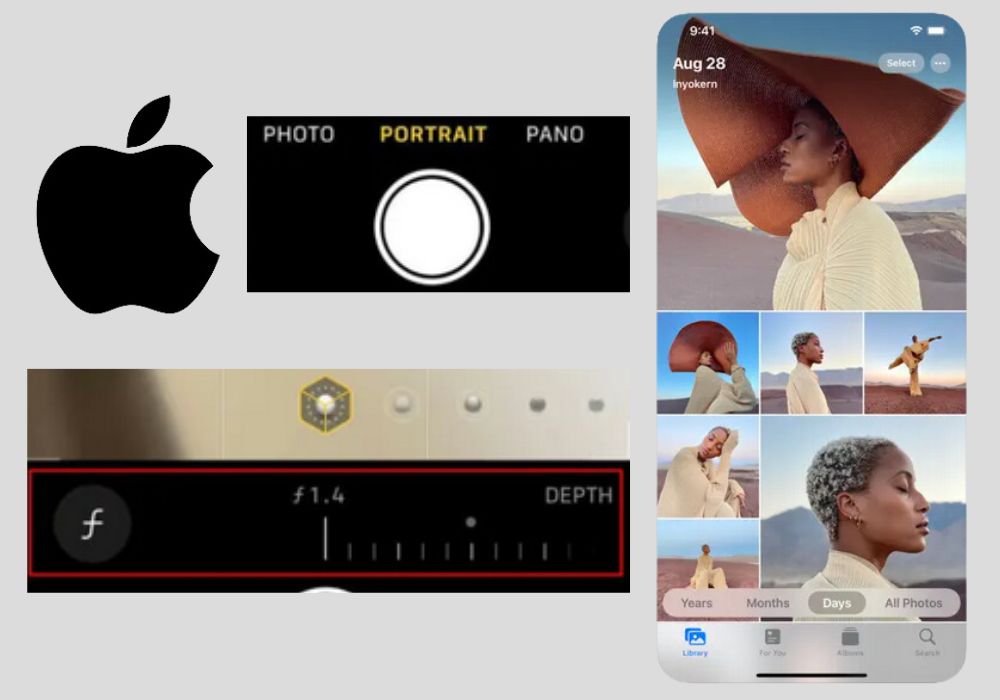
When it comes to blurring images, portrait mode offers the best results for iOS devices and users. Portrait mode focuses on the central subject and defocuses the background through the help of a large aperture and shallow field of effect. However, this feature is available from the iPhone SE (2nd generation) and later, iPhone X and later, as well as the iPhone 7 Plus and iPhone 8 Plus.
Here’s how you can blur the background on your iPhone using Portrait Mode.
Step 1: Open Portrait Mode on your device.
Step 2: Tap the subject to focus on it.
Step 3: If you want to modify the blurring properties of your photo, click on the ‘f’ icon in the top right corner.
Step 4: You will now have access to a depth control slide. Using it will allow you to see what your picture will look like before clicking it.
Step 5: You can also experiment with the lighting effects dial which offers different options like Natural, Studio, Stage Light Mono, High-Key Light Mono, and Contour.
Step 6: Once you’re satisfied with the preview, click your picture.
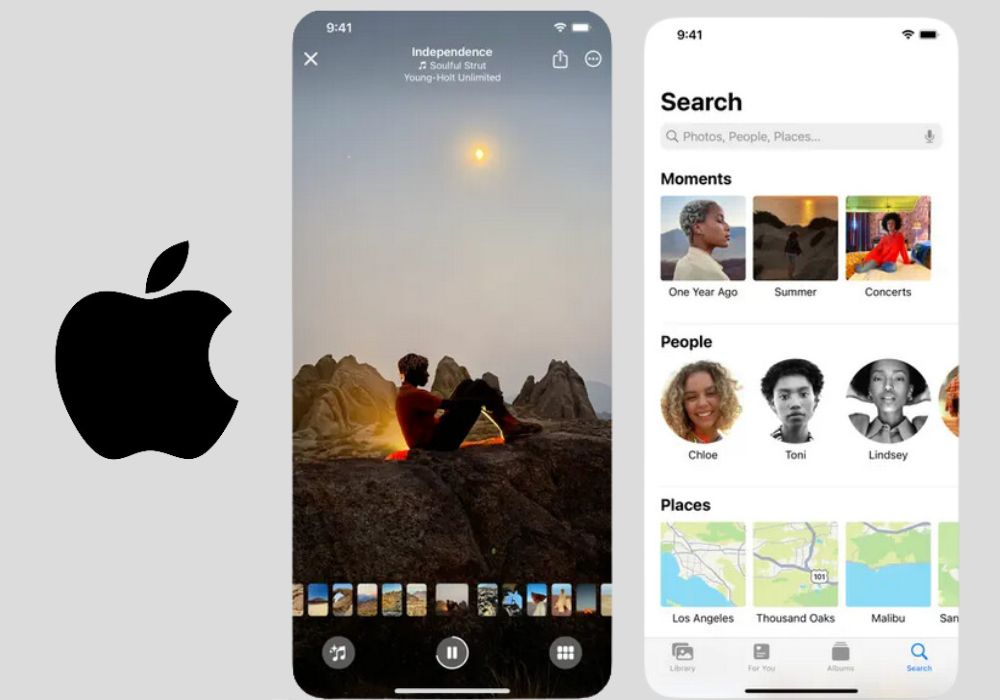
You can use the pre-installed Photo App on your phone to blur the background of your image. However, do note that you can only apply the Portrait mode on iPhones that have the Portrait Light Effects. Here are the steps on how to blur the background of a picture on iPhone without Portrait Mode.
Step 1: Select the photo in which you want to blur the background.
Step 2: Select ‘Edit’. Now select the light effect that you want.
Step 3: Drag the slider to your left and right to check the intensity of the effect that you are using.
Step 4: Once you are done and satisfied with how your picture looks, click on save.
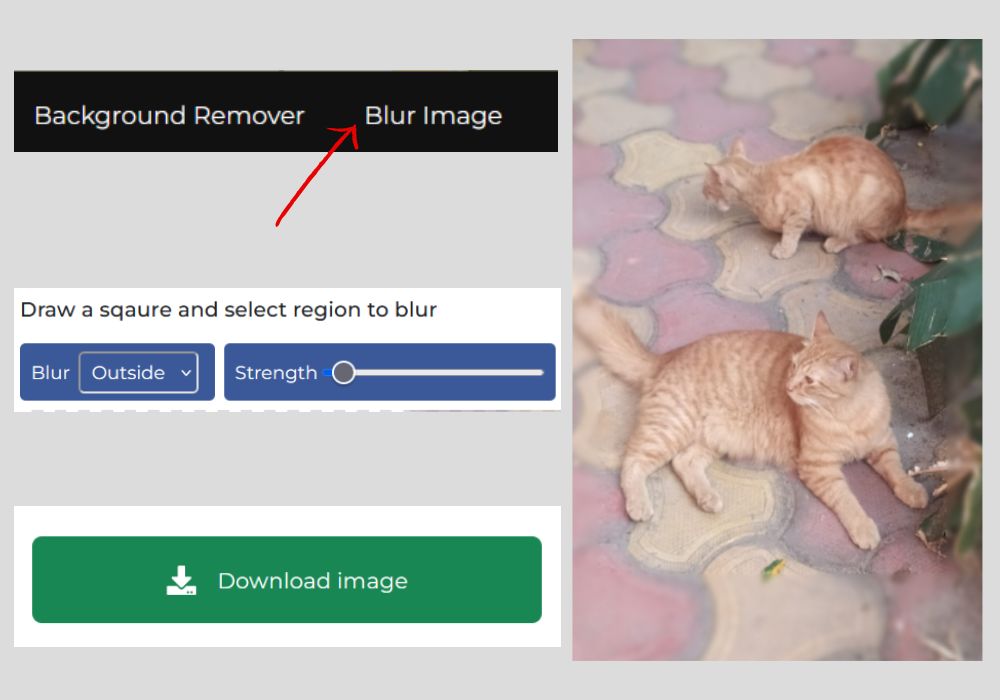
Sketch My Pic offers a wide variety of editing options for your pictures. From converting your image to cartoons, pop art, and oil paintings, Sketch My Pic is free to use and can be utilized for versatile purposes and needs. The online tool has a built-in ‘Blur Image’ Option which you can avail from your iOS devices to blur your picture.
Simply, follow these steps to get a refined blurry finish to your pictures.
Step 1: Open Sketch My Pic through your Web browser on your iOS devices.
Step 2: On the top-right corner, click on ‘Blur Image’.
Step 3: You will be redirected to the ‘Blur Image’ editing page.
Step 4: Click on Upload Image and find the picture that you want to blur.
Step 5: The picture will now get uploaded. Since you will blur the background, click on Blur settings on the left-hand side and choose ‘Outside’.
Step 6: Select the area that you want to blur and then slide the strength dial to add the intensity of the blur.
Step 7: Click on Download Image and save it.

Apps like Canva and Fotor can also help create a blur effect for your background. Here are the steps you can follow in Canva to get a blurry effect on your photos.
Step 1: Open Canva on your iOS device.
Step 2: Upload your image. Click on the ‘Edit image’ tab and then scroll to ‘Effects’ and select Blur.
Step 3: Using the Brush tool, manually mark the areas in the background to apply blur.
Step 4: Once you are done, you can save the picture.
The only issue with this tool is that it is time-consuming and can be quite a hassle to use.
Additionally, you can also use the 'Autofocus' feature on Canva. Canva will automatically detect the subject and blur the areas around it.
Also, check out: How to Remove Color From Image
To capture the perfect blur and bokeh effect for your image there are certain things that you should keep in mind.
Be mindful of the lighting exposure where you are clicking your photo. It is important to remember that environments with dim lighting and low light will not make the Portrait option on your iPhone work effectively.
Pay attention to the distance between your subject and the camera lens. You can only apply portrait mode at a certain distance from your subject. Being too close or too far away from your focus can prompt notifications to appear to move away or come closer to your subject respectively. The ideal distance for Portrait mode to effectively work is 0.5- 2 meters.
If you have the perfect distance from your subject and iPhone, a yellow box will be prompted, indicating that your iPhone has successfully identified the subject and will defocus on the background, creating a perfect bokeh effect.
Also, check out: How to Blur a Picture: A Detailed Guide
We hope this blog on how to blur background on iPhone was beneficial for you. Blurring is an essential tool that can be used for many purposes like reducing clutter and sharpness of your image and solely focusing on the subject to create a distraction-free atmosphere for greater branding and professionalism. We always advise our photo enthusiasts to experiment with editing and photography because there is no one way to go about it.
If you like our blogs, feel free to check out our page and share it.


