
By Suneha
Guide
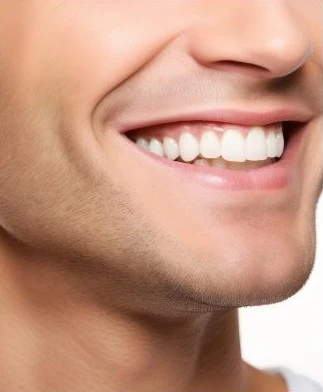
Whenever, a camera is pointed at you saying ‘Cheese!’, do you worry about how your teeth look in that photo? Don’t worry, for we have got you covered with our ‘how to whiten teeth in photos’ tutorial.
Teeth whitening techniques are used greatly in commercial shoots and professional headshots to create a great impression. It helps cover up teeth stains and yellowing of teeth. We hope that through this tutorial, you can learn more about photographic editing and its usage.
Photoshop is one of the most advanced software to use when it comes to photo editing and learning more about photography and design. In this tutorial, we will look at Photoshop and its Hue/Saturation layer to bring lightness to the teeth and other objects.
Step 1- Launch Photoshop. Upload an image of your choice.
Step 2- Create a new Adjustment Layer so that your work is more flexible. This can be done by hovering to the Layers panel and clicking on the Create New Fill or Adjustment Layer button.
Step 3- Click on the Lasso tool from the toolbar. Start drawing and selecting around the teeth, staying as close to the edges as possible.
Step 4- Click on the Adjustments drop-down menu and select the Hue/Saturation adjustment layer.
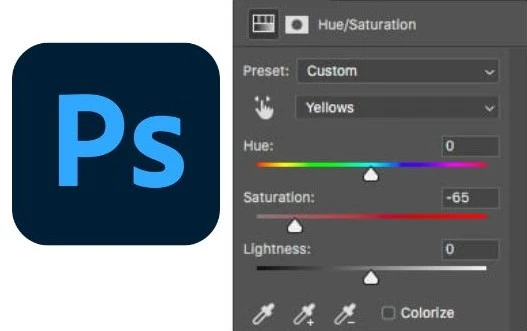
Step 5- Choose Hue/Saturation. Click on the Properties Panel and click the options bar labeled Master and select Yellows.
Step 6- Click on the Saturation slider and drag it to the left. The more you decrease, the yellow will desaturate, making the teeth whiter.
Step 7- You can compare the original picture with the modified one by simply clicking on the Hue/Saturation layer’s visibility icon (the eye icon next to the layer). Clicking on it temporarily hides the changes you made.
Step 8- After whitening the teeth, you can brighten them. To do so, click on the Edit option in properties and click on Yellows> Master.
Step 9- Click on the Lightness slider and drag it towards the right. The further you drag, the lighter the teeth will appear.
We hope that this tutorial was helpful!
To create the perfect smile, you can use a bunch of other applications which can be found in the Apps Store for Android and iPhone.
1. PhotoDirector- PhotoDirector is a great app to whiten your teeth and edit your photos. It is available for Android and iPhone users.
The app offers a wide variety of options to animate and remodify photos, remove objects, and change backgrounds. It has a teeth whitening feature that uses AI-powered tools and is a free and relatively fast way to adjust your photos.
The app detects your face automatically and has a teeth whiten option which can be easily adjusted.
2. Pixlr- Pixlr offers professional filters and different layers and masks for photo editing. It is a free teeth whitening app that can remove stains and yellow teeth easily. It has an automatic correction function, which allows you to customize photos and images in one click, making it relatively fast to use.
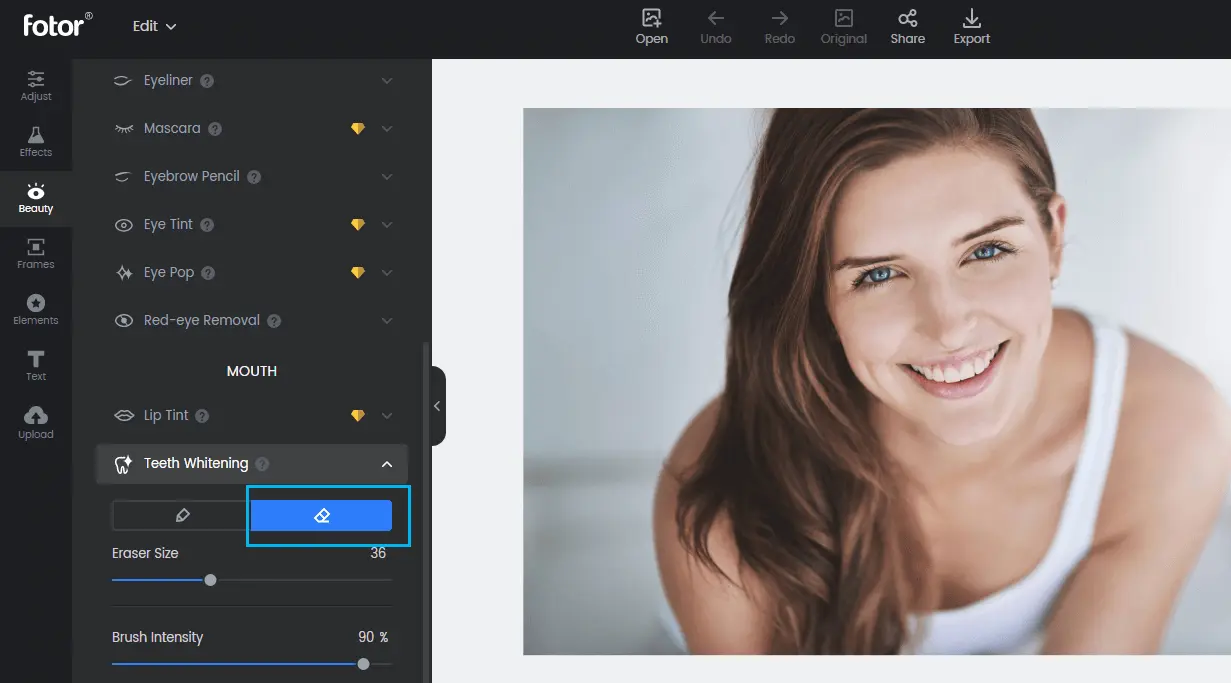
image source: Fotor
3. Fotor- Fotor’s teeth whitener option is very quick and easy to use. You just need to upload your image by clicking on the Open Image option and then select Beauty. There you will find the teeth whitening tool.
By holding the mouse and dragging it across, you can clear any stain and make your teeth whiter. You also have the option to change the brush size and the brush intensity.
The app also has other options like changing lip color, etc.
4. YouCam Makeup- YouCam Makeup has a wide variety of face retouching tools, teeth whitener being one of them. You can automatically remove blemishes, edit your face and nose, etc.
The app uses AI technology to detect your face. You can easily adjust the slider available in the app to make some changes to your teeth.
The app also has advanced filters and effects. However, in-app purchases are required to remove ads.
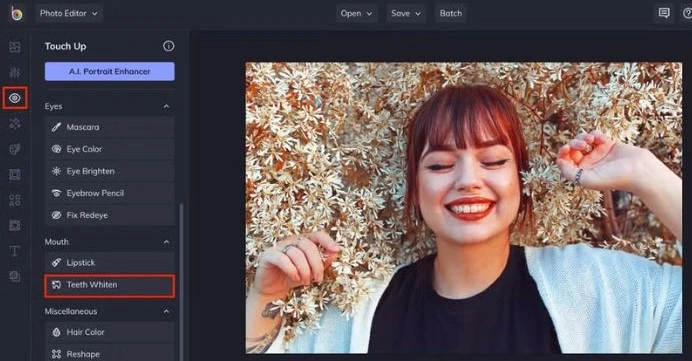
image source: beFunky
5. beFunky- beFunky makes your smile shine with its teeth-whitening feature. It has a touch-up tab which has multiple options and the Teeth Whiten option can be found under the Mouth category.
The Brush size and Brush hardness options need to be adjusted to get the desired results. The app is relatively easy to use and can be used for a wide variety of reasons.
6.Facetune2- Facetune2 is a professional portrait retouching app with many effects and filters. It is easy to use. Its biggest drawback is that you need to pay to unlock additional tools.
In its retouch option, you can edit your teeth as per your needs and desires. The Patch tool also allows for removing blemishes and scars. In its whiten option, you can drag the slider to whiten your teeth.
7. Photoshop Fix- Photoshop Fix is a great app that has a lot of tools like color, paint, and defocus. You can retouch your photos in this app, for instance, you can brighten your teeth and make your smile shine more with this app.
The app provides plenty of brushes, color palettes, and tools to make the teeth look brighter or lighter. This app has a similar vibe to that of Photoshop. It is also very user-friendly.
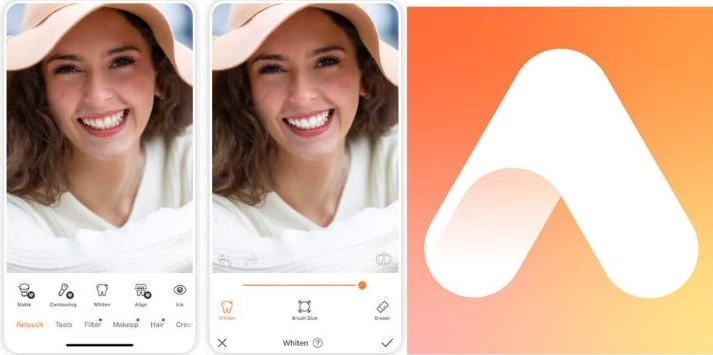
8. AirBrush- AirBrush is a great app to whiten your teeth. You can brighten your smile and make it look natural. It also offers amazing lighting effects and filters.
You can simply whiten your teeth by going to the Retouch tab and then clicking on Whiten. You can also smoothen your skin, remove scars and blemishes. However, the smoothening effects do not work well for dry skin.
9. Sweet Selfie- This app is suitable for Android users. It has a lot of background filters and a plain interface, making it convenient to navigate through the app.
You can easily whiten your teeth in this app and remove blemishes.
We hope that the 'how to whiten teeth in photos' tutorial was easy to understand. We hope that your photographic knowledge has improved and you are more open to experimenting and exploring options. Whether you want to whiten your teeth for a casual picture or for a commercial shoot, we hope this guide was helpful!


