By Arjun
How To'sSamsung is capturing the detailed lunar surface all over the internet! But what about iPhones? How to take pictures of the moon with an iPhone is a great question when you're a budding astrophotographer!
Even though the iPhone's cameras sometimes struggle to capture the most in low-light settings, we will explore some of the most tried and tested ways to capture all the stunning sides of the moon. Let's dive in!
Taking pictures of the moon using an iOS device can be challenging for the following reasons:
✓ Brightness & Contrast: The Moon is the brightest object in the Nightsky, making it difficult to capture without underexposing the Nightsky.
✓ Camera Settings: General knowledge is required to adjust the ISO and exposure settings manually.
✓ Atmospheric Conditions: Earth’s atmosphere is filled with turbulence and distortion, especially at low horizon. Light pollution, clouds, and atmospheric moisture are the barriers to lunar pictures.
✓ Zoom & Focus: The Moon is far, and you can only zoom so much on an iPhone. Achieving a precise focus can be tricky for the bright lunar surface.
✓ Post Processing: The raw capture will only take you so far, requiring some post-processing skills to highlight the lunar areas and make light corrections.
There are two ways to take pictures of the moon with an iPhone: Using the night mode and without using the night mode.

iPhones are known for their low-light photography. Therefore, taking pictures of the moon in iPhone night mode can lead to auto-corrected pictures that don’t need much post-processing. Here’s how:
Step 1: While taking a picture of the moon in low light, open the camera of your iPhone. Find & tap the low light icon beside the flash icon on the upper left side.
Step 2: The low-light icon will turn yellow if the night mode is ON. It will be white or disappear if the low-light mode is OFF.
Step 3: To capture the moon, you must stay still for a few seconds after hitting the capture button so the camera can adjust the picture to low-light settings before saving it to iCloud Photos.
Since Night Mode is only available on iPhone 11 models and higher, you can use the following steps to take lunar pictures without it and still get some good results. Here’s how:
Step 1: Open the camera on your iPhone.
Step 2: Point the lens toward the lunar surface and hold the subject on the screen, i.e., the moon, until a yellow square box appears around it. Swipe down beside it to adjust the exposure and lock the subject with the suggested settings.
You can always find more camera settings by swiping up, which reveals more options such as flash, night mode, exposure, contrast, zoom levels, and much more. Tweak, play with all the options, and find the correct settings after judging the Nightsky.
Here are some quintessential tips you need for taking great pictures of the moon using an iPhone:
✓ Adjust Camera Settings: Use manual mode to set low ISO at 100-200 and fast shutter speed (1/125 to 1/250 seconds) to adjust the exposure from the lunar surface.
✓ Use a Stable Tripod: Night mode takes time to capture pictures in low light due to live image adjustments. Therefore, we suggest you get a tripod so your iPhone can stay steady while taking pictures.
✓ Focus Manually: If you have a lens with a long focal length of 300mm or more, great! If you don’t have one, you can manually focus lock by holding onto the subject and using live view to zoom in and fine-tune your focus.
✓ Consider Atmospheric Conditions: Use Google Maps to find high-altitude places with clear skies and less atmospheric turbulence. Keep an eye on weather forecasts before selecting the day for lunar photography.
✓ Timing and Positioning: Capturing the moon during its various transitions can highlight the areas that are hard to see on the iPhone due to high exposure. Be patient and plan ahead.
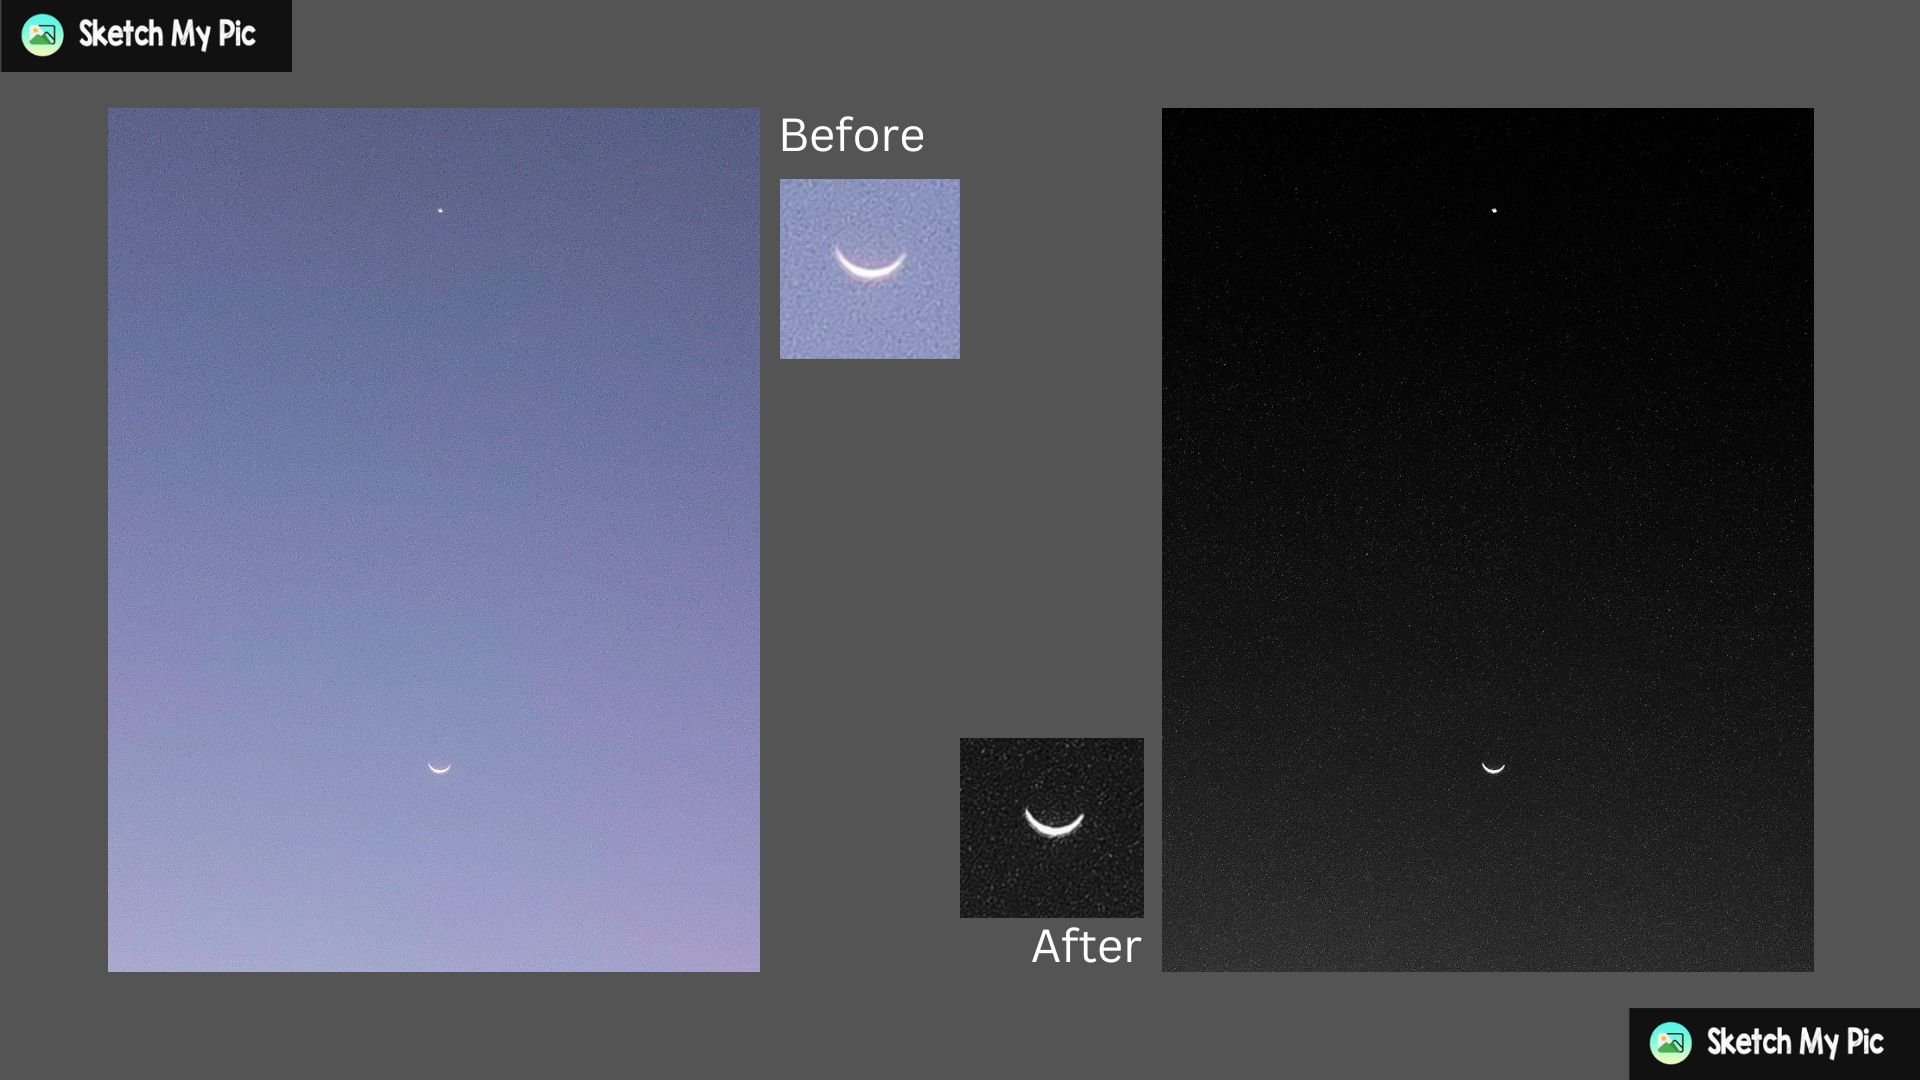
✓ Use Post-Processing Software: Your Picture is hidden data that can only be revealed using some post-processing software such as Photoshop or Lightroom. You can reveal more details of the lunar surface by reducing the noise and doing some editing magic that is directly available on an iPhone.
Now that we know most of the essential tips we need in this article, you can take stunning lunar pictures like a pro! If you need any help understanding further about iPhone photography, you can contact us. Happy captures!


