By Suneha
Guide
In the realm of photo editing, the stretching of photos is a common intentional or unintentional phenomenon. It is essential to be aware of photo editing mistakes that lead to stretching of photos excessively. This results in the loss of significance of the image and creates an unnatural appearance of the subjects.
In this guide, we will discuss how to stretch photos by using several photo editing software and online applications without causing unnecessary wear and tear to the image overall.
Photoshop is a must-have software for anyone learning photography techniques and editing. There are a few methods that you can use in Photoshop to stretch your photos. This results in resizing the Image. Here are a few ways on how to stretch photos using Photoshop.
Option 1: Using the Transform Tool. The Transform tool offers a lot of options, one of which is stretching your Image.
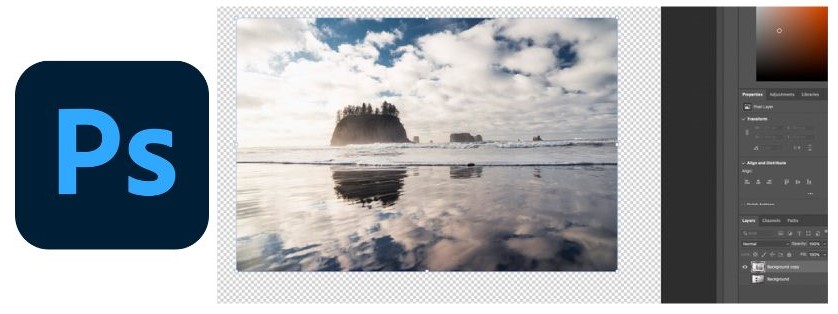
Step 1: Open Photoshop and create a new document. The canvas should be larger than the intended Image; otherwise, the Image will be cropped if you stretch it beyond.
Step 2: Add an Image to your Canvas by dropping it from your computer. The Image will be added as a new layer. Ensure that the Image is selected in the Layers Panel.
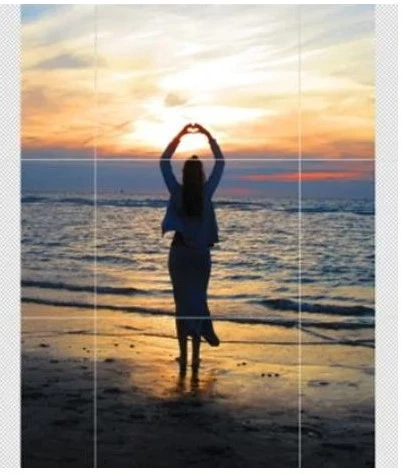
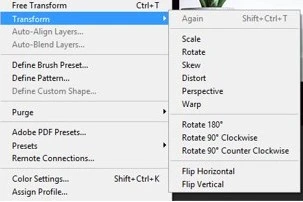
Step 3: Select the move tool and use the transform tool by scrolling to Edit and then Free Transform.
Step 4: Click on the anchor points and drag them to stretch the Image. Press enter to confirm your changes.
Option 2: Open the Image Size Window
Step 1: Open the file and go to Image and then Image Size.
Step 2: Stretch the Image using the width and height option. Ensure that you select percent from the drop-down menu and increase the height and width dimensions as per your needs. Then click on OK.
Step 3: The image size will increase as per the amount you inputted in the box.
Option 3: Using Content-Aware Scale
Step 1: Make sure that your Layer is not a smart object. Go to Layer, click on Rasterize, and then Layer.
Step 2: Use the Crop tool to extend the canvas
Step 3: To activate the Content-Aware scale, head to Edit and click on Content-Aware scale. Adjust the dimensions of your image as you desire.
Select the move tool from the toolbar to prevent distortion when stretching an image. Then click on Show Transform Controls in the options bar and turn on the transform controls. The Image should now stretch without distortion.
However, if the image appears distorted, ensure that the Link icon is active in the Options Bar.
MS Paint allows you to stretch your images. Here is a step-by-step guide on how to stretch photos using MS Paint.
Step 1: Open your photo in Paint.
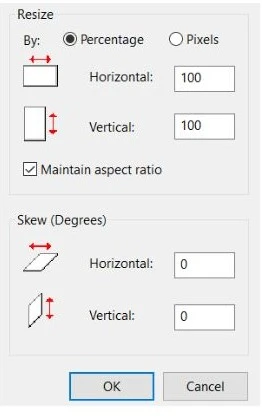
Step 2: Click on the Resize Button which is available in the Image Tab. A resize and Skew tab appears after that.
Step 3: Click on Resize. You can resize your Image using pixels or percentages. You can change the dimensions of the Horizontal and Vertical tabs as per your needs.
Step 4: If you want to maintain the photo's look, make sure to check the Maintain aspect ratio option.
Step 5- Once you get the desired look, click OK. You can press Ctrl+ Z if you don't like the appearance.
Here is a detailed step-by-step tutorial on how to stretch photos using Preview on Mac.
Step 1: Open the photo in Preview.
Step 2: Click on the Tools menu and from the drop-down bar, click Adjust Size.
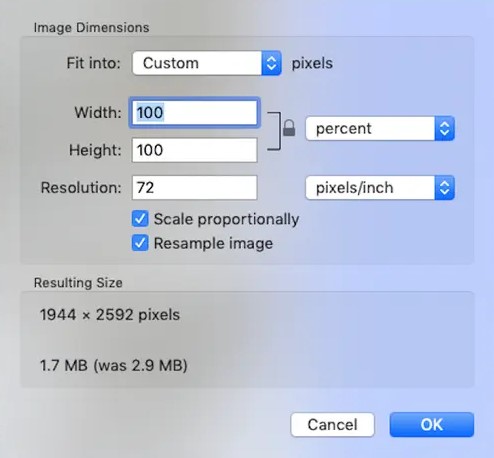
Step 3- A menu will open with the image dimensions. Select the unit you want the Image to be in (pixels or percent). You can input your values in the width and height bars as you deem fit.
Step 4: Click on the boxes named Scale Proportionally and Resample Image.
Step 5: Once you are done with the adjustment of the image dimensions, click on OK.
Step 6: Save your Image by clicking Cmd+ S.
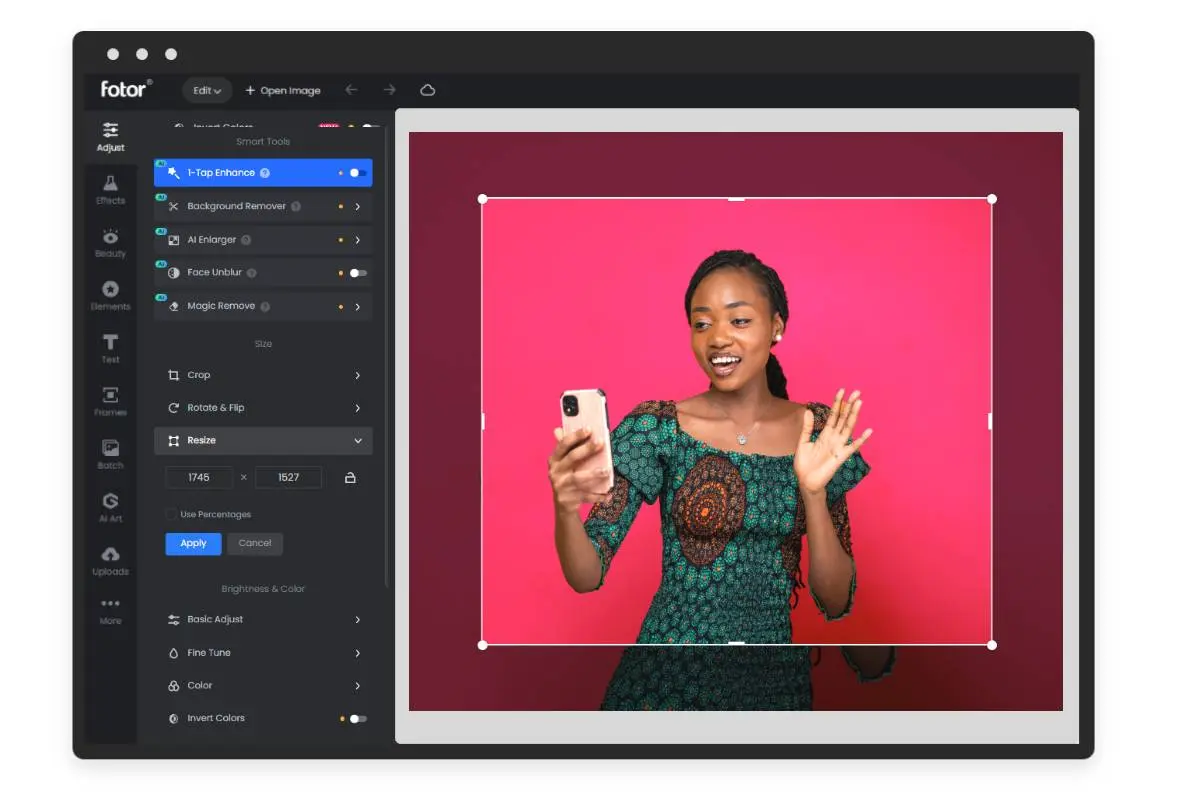
image source: Fotor
Fotor offers a wide range of services for your needs. It is beginner-friendly and is free to use. Fotor allows you to easily resize your Image without distortion and losing its quality.
Step 1: Open Fotor. Click on Stretch an Image For Free.
Step 2: Upload the picture that you want to resize.
Step 3: Go to the tool menu and click on Resize.
Step 4: Enter a new size for the image in the Width and Height tabs. You can also resize the image by adjusting the percentage.
Step 5: If you wish to maintain the original ratio of the Image, lock the Keep Proportions online.
Step 6: Click on Download and save your resized and adjusted stretched Image.
It is important that you remain aware of the impact you create on your Image after stretching it. Excessive stretching causes your photo to lose its quality and significance. There are several circumstances in which people stretch photos.
1. Display Aspect Ratio is Mismatched - In some devices, photos might appear more stretched if the display settings are not configured correctly. Stretching can be done to correct the Aspect Ratio.
2. Special Effects - Stretching can be used to achieve special effects in photography. This type of technique is commonly used in abstract or surreal photography.
3. Layout Constraints - There might be scenarios in designing and animation where an image needs to be fitted in a specific layout. Stretching is necessary in such cases to meet the requirements of the layouts. Please ensure that the Image's appearance does not compromise the overall design.
4. Experimentation - If you are working on a personal project or are simply looking to explore photo editing techniques, stretching photos might be a part of your exploration. Experimenting with things helps in increasing creative intent and artistic goals.
We hope the guide on how to stretch photos was helpful. We wish you a happy photo editing journey.


