By Suneha
GuideOne of the best photo editing applications, Canva is the perfect destination for designers and photographers to use for a wide variety of purposes including resizing an image. In this article, we will show you how to resize an image in Canva using two methods. One with Canva Pro and the other manually for free. We will be showing you both the methods so you can easily understand how to resize an Image in Canva.

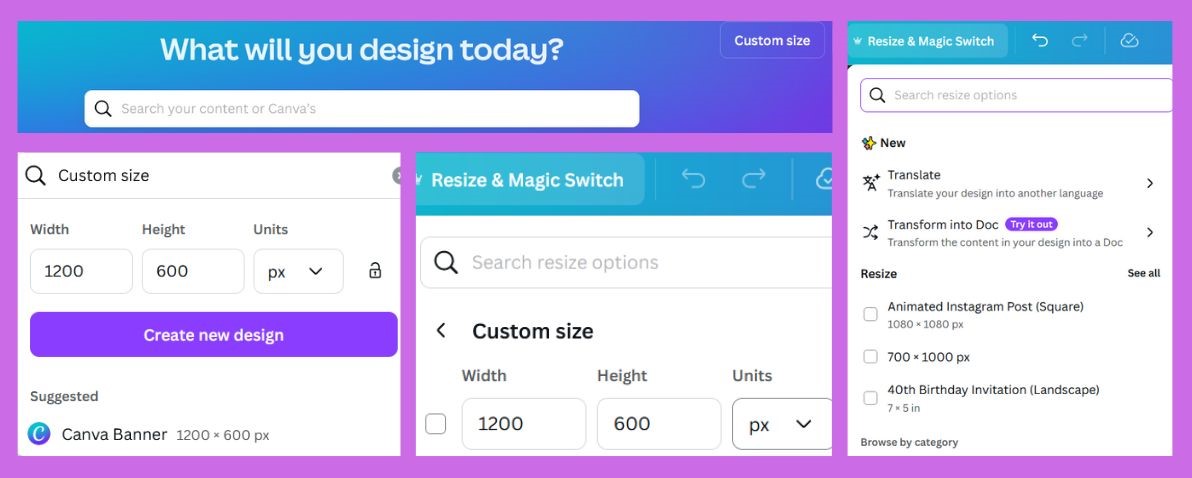
One of the ways you can resize an image in Canva is with the Resize Feature which is available for Canva Pro Users. It is convenient and easy to use to avoid any inconvenience and hassle. Here, is how to resize an Image in Canva using the Resize Feature in Canva Pro.
Step 1: Open Canva in your web browser or Install it on your mobile devices.
Step 2: Create a New template with your custom dimensions.
Step 3: Upload your images onto the template.
Step 4: To resize the dimensions, click on the ‘Resize’ tab. This feature is only available for Canva Pro which you can buy with a subscription.
Step 5: If you have a specific dimension in mind, input the dimensions. You can put in the height and width in inches, centimeters, pixels, or millimeters.
Step 6: You can also input the type of image you want to use in your template. For example, you can simply type an Instagram post and Canva Pro will automatically resize your image.
With this, you have completed resizing your Image in Canva. Please note, that this can only be used by Canva Pro users. This is a convenient and easy way to resize an Image in Canva.
Also, check out: How to Reduce Photo Size in KB: 9 Easy Ways

While the above-mentioned solution works best to resize an image in Canva Pro, you can manually resize your images with Canva. The method is inconvenient and a bit time-consuming but it gets the task done.
Step 1: Open Canva on your web browser or Install Canva on your mobile devices.
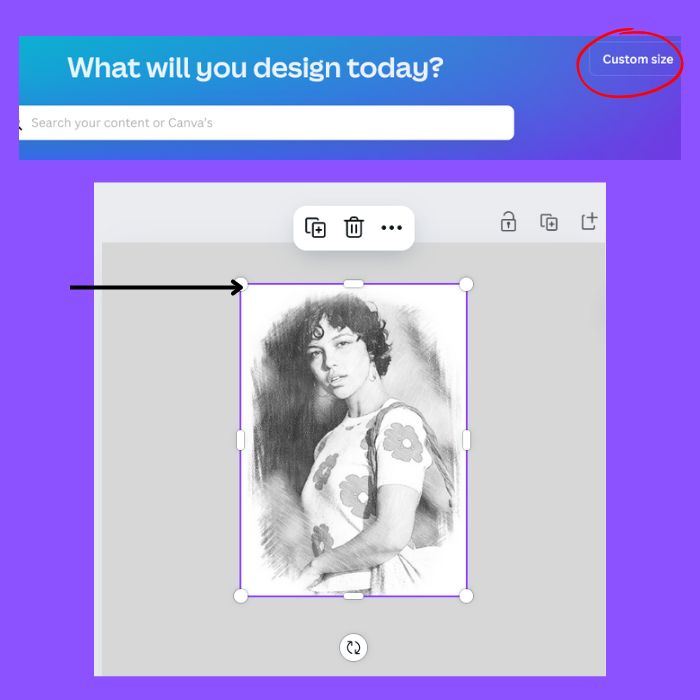
Step 2: You will be on Canva’s Home page where you need to navigate to the section ‘Custom Size.’
Step 3: In the custom size tab, change the unit of measurement to your liking. You can use pixels, inches, millimeters, or centimeters.
Step 4: Now click on ‘Create Design’ and now you will have a blank design with the measurements you put in.
Step 5: Now click on the ‘File’ tab and go to ‘Show Rulers and Guides.’ This will help you in understanding the measurements of the image you will upload.
Step 6: Now upload a picture by going to the Upload tab on the left side. Canva accepts multiple formats like JPEG, PNG, SVG, PDF, and many more.
Step 7: Once the file is uploaded, drag it to your blank template. After clicking on the image, you will be able to access four points.
Step 8: Using your cursor, drag the ends of the image to fit the template. This part is up to you; you can enlarge or decrease the size of your image depending on what size you want.
Step 9: Once you are done, click on the ‘File’ tab to save your image.
Step 10: Go to the ‘Download’ option and select the type of file you want to download your image in from the drop-down menu.
Step 11: We recommend that you select the PDF file because it is more convenient to store.
Step 12: Now you are all done! Your downloaded image will come on the file as the dimensions you had given in the template.
This method is the only way to resize images on Canva for free.
Also, check out: How to Remove Color From Image
Canva offers a great variety of tools for all its users. It is one of the best photo editing apps and is easier to use for beginners. However, some of its best features are reserved for Canva Pro users like the Resize tool. We hope this article on how to resize an image in Canva was helpful to you.