By Suneha
GuideIn the realm of design and photography, creative and artistic exploration is essential to expand your knowledge. There are a lot of software and applications that offer a wide variety of options, one of which is outlining a picture. In this blog, we will provide a step-by-step tutorial on how to outline a picture.
Outlining a picture is a great way to bring focus and attention to certain details of a picture and it helps in perceiving the depth and colors of an image in a more visible manner.

image source: Fotor
There are certain benefits that come with outlining a picture. Here are a few reasons why outlining a picture helps in the domain of photography.
1. Clarity and Definition - Outlining a picture helps in defining the object's edges and the subjects in a picture. It makes it easier for spectators to identify and distinguish elements within the image as it provides clarity and defining features to the photo.
2. Emphasis on Forms - Outlining a picture helps in emphasizing the form and shape of the picture, highlighting the structure of its objects and subjects. This is particularly useful for three-dimensional aspects of subjects, adding depth to the picture.
3. Helps in Separating Elements - Outlines help in enhancing clarity and defining features and elements of an image. Outlines also greatly help in separating different elements of the picture, reducing the chances of confusion. This is particularly helpful in photos that have a lot going on as outlining the elements can separate the foreground and background elements.
4. Centrality of subjects/ objects - Outlining a picture strategically helps viewers get specific details of an image. For instance, in cases of storytelling or narration, outlining the subject helps in focusing on its centrality. Outlining a picture is a good tool for focusing and giving attention to specific details.
5. Enhanced Visibility - Outlining a picture or image improves the visibility of the details and objects of the picture. The constituent elements of the images are given enhanced visibility by drawing attention to specific areas through outlining.
6. Experimentation - Outlining pictures helps in experimenting with artistic styles and photographic techniques. It enhances creative thinking as artists can experiment and explore with depth, color, perceptions, and other visual effects.

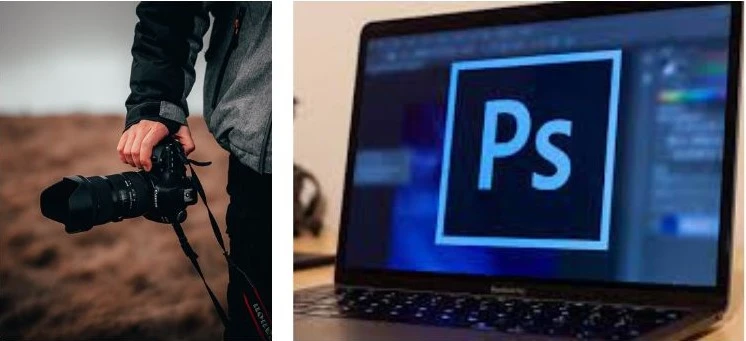
Outlining a picture in Photoshop is easy and convenient because of the Layer Style panel. Here's a tutorial on how to outline a picture using Photoshop.
Step 1 - Open Photoshop and upload an image with a subject in it.
Step 2 - To outline the subject, click on the Object Selection Tool in the toolbar. If you're using a Photoshop version that is older than Photoshop CC 2020, click on the Quick Selection Tool instead.
Step 3 - Set the Object Selection tool to Rectangle and check off Enhance Edge and Object Subtract. Click and drag the rectangular section around your subject and let go. This will make Photoshop snap your selection around the subject.
Step 4 - Duplicate the Selection onto a New Layer. Double-click on the new layer and open the Layer Style Window.
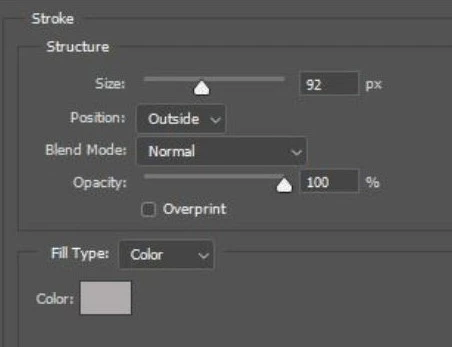
Step 5 - In the Layer Style Window, choose the Stroke option from the left-hand panel and adjust the settings by setting the position to Outside and the Fill Type to Color.
Step 6 - Choose a color to border your selection. You can also adjust the size of the slider by dragging the slider as per your needs.
Step 7 - You have now outlined a picture successfully!
You can also add multiple layers by following the above steps to create the first outline. For multiple outlines over a picture, Add a new stroke effect on the Layer Style Window and press the plus icon beside the stroke option.
A second stroke option will appear and you can customize it by changing the color and size.
Here's another tutorial on how to outline a picture, focusing on the edges of an image.
You can outline an entire photo rather than a small section by creating a border around the whole picture.
Step 1 - Duplicate the layer you want to create a border around. Click on the Layer Style Panel and select Stroke from the Styles on the left-hand side window.
Step 2 - Set the stroke position to Inside and the Blend Mode to normal. Choose the color you want to outline your photo.
Step 3 - Adjust the size of your stroke by dragging the size slider. This depends on your needs.
Step 4 - You have successfully created a customized border for your picture.

Canva is a great application to start your photography and design journey. It offers endless services one of which is outlining a picture. Here's a step-by-step guide on how to outline a picture using Canva.
Step 1 - Open Canva.
Step 2 - To outline a picture in Canva, you have to remove the background first by editing the image and clicking on BG remover.
Step 3 - The picture's background is automatically erased creating a selection of your subject. You can select the Erase Button option to erase any extra pixels and the Brush Size Slider. Once done, click on Apply.
Step 4 - Click on Edit Image and select Shadows and then choose Glow. Click on the settings and increase the transparency up to 100 percent. Keep the scale size at 0 and adjust the size slider as per your needs. The Blur option 0 offers a jagged edge whereas the Blur option at 1 offers a slight blur to your outline.
Step 5 - Select Color Picker and change it to the color you want your final design to be.
Step 6 - Click on Apply. Your picture will have an outline on it.
We hope that this detailed step-by-step guide on how to outline a picture has been beneficial to you! As a beginner, photo editing techniques can be a little difficult to digest but with the right tools and the right tutorials, it becomes a more convenient and more fun process.


