
By Arjun
How To'sKnowing how to unblur an image before capturing it is much more effective than post-editing practices. But if you want to correct already-captured photos, this article will explore how to make a picture less blurry and what factors contribute to a good capture. So, let’s dive in!
Before diving into a practical guide on how to make a picture less blurry, let’s understand the reasons that contribute to making a picture less blurry:
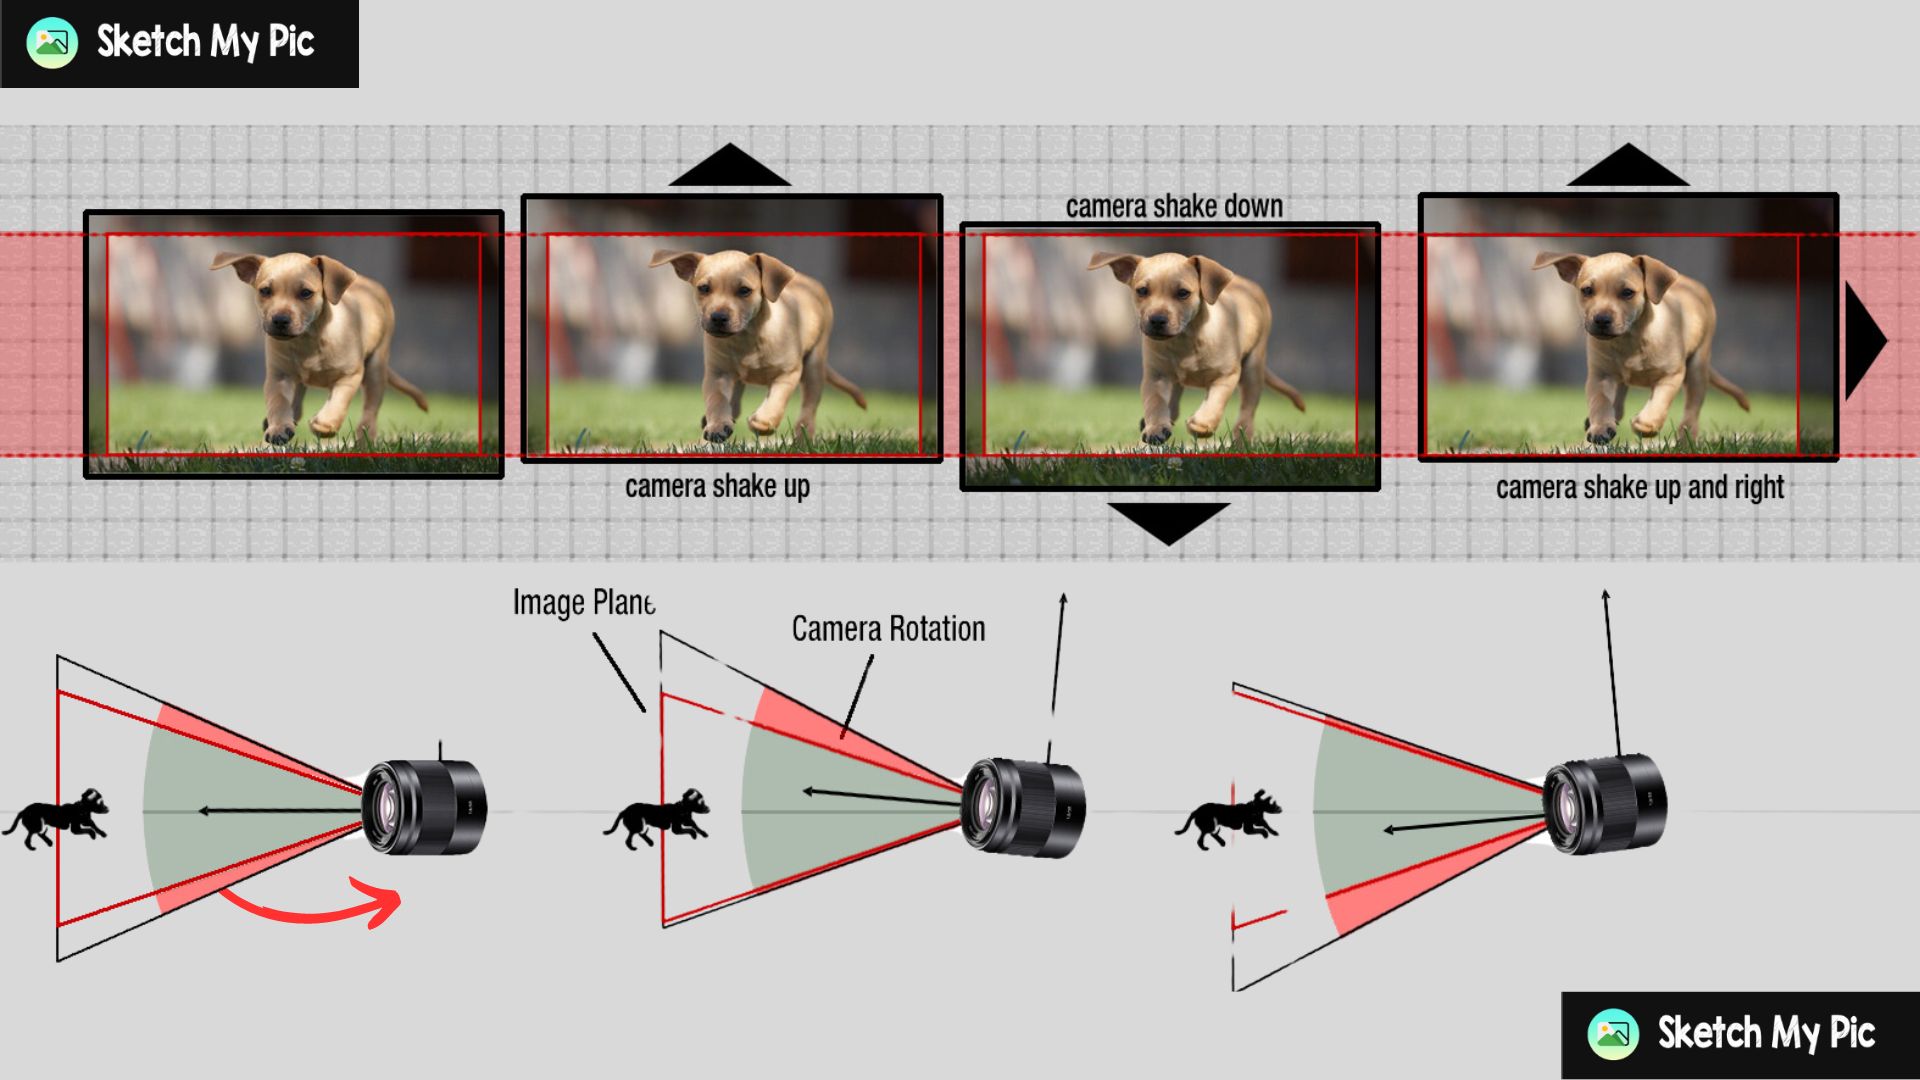
Camera shake is the single most known culprit for blurred images. While shooting handheld or in low light, image stabilization techniques are crucial for taking the shake off the grid. Since today’s lenses are equipped with Optical Image Stabilization (OIS) or in-body image stabilization, they can only reduce the blue after capturing the photo.
Therefore, pre-capture advice would be to use a proper tripod or a stabilization rig to reduce the image blur. You can also use the smartphone stabilization technique to reduce blur and capture your desired image.
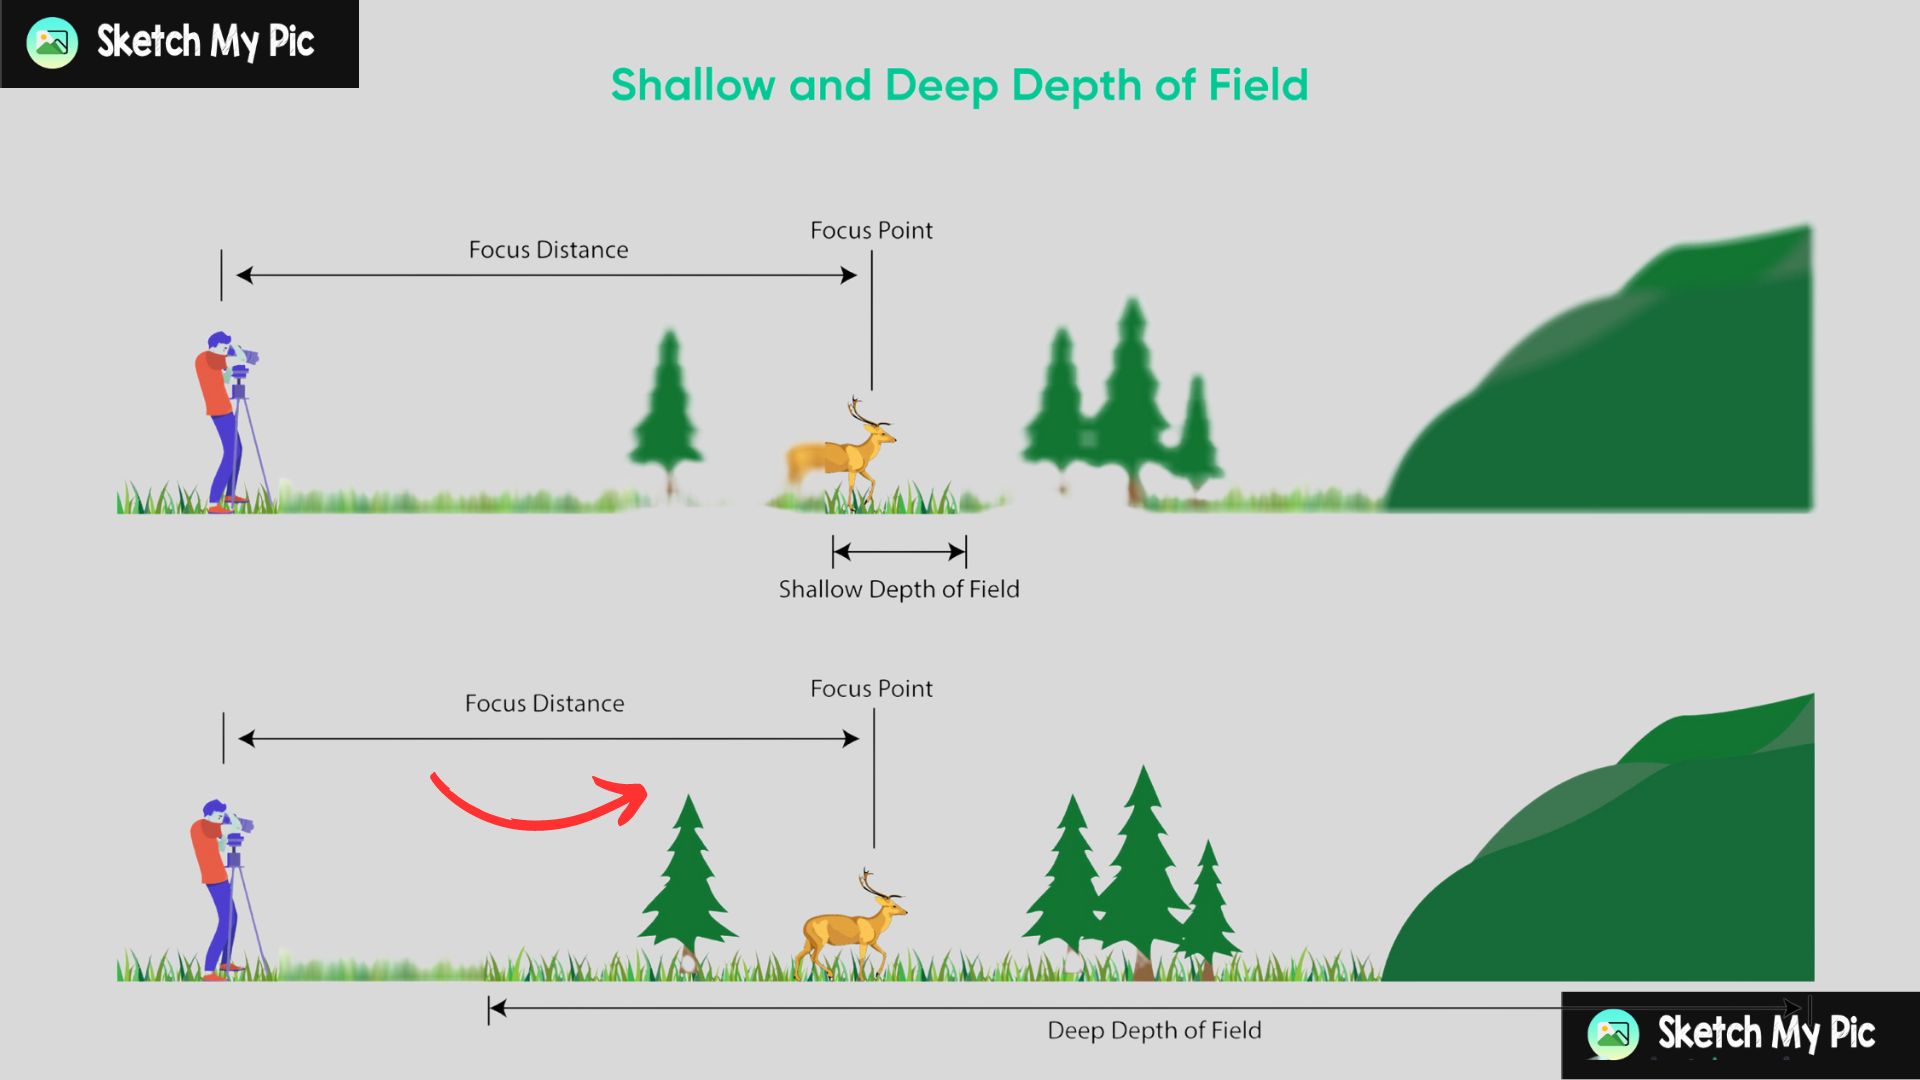
Focus and depth of field play an essential role in sharpening the subject and defining the background against it. Using manual focus (recommended) or selecting the appropriate autofocus areas will let your device know where to apply focus and capture the desired image.
You can change the type of depth of field in the aperture settings. For example, shallow DOF requires a wide aperture, and deep DOF requires a narrow aperture to enhance the overall sharpness and composition of your captures.
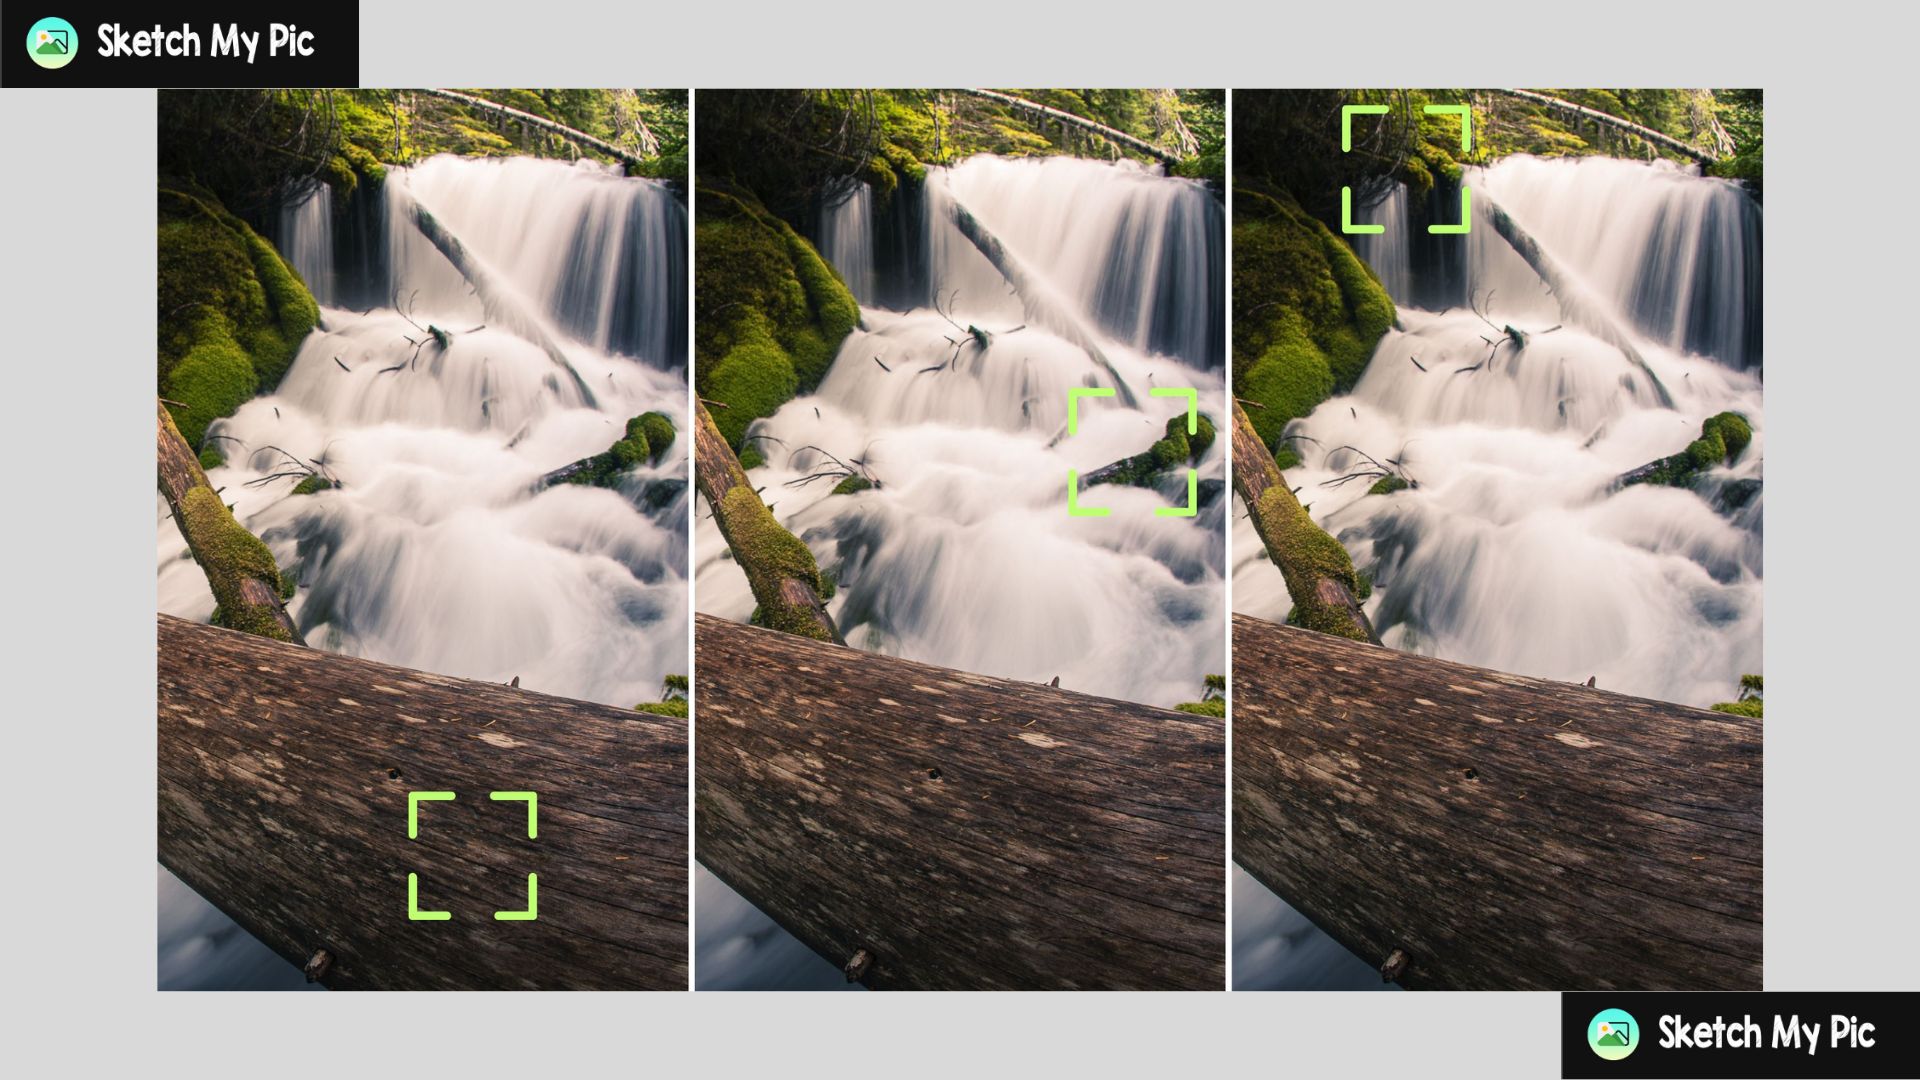
Focus stacking is another powerful technique for deblurring images quickly. You can take multiple photos of the same scene, each with a different focal point, and combine them in post-processing. This way, you can precisely manipulate every subject in the image and enhance the blur accordingly for maximum clarity.

While sharpness controls the definition of edges within a picture, contrast affects the light and dark areas by adding depth and dimensions to your image. These two factors play a vital role in blurred images, defining the background using sharpness and a depth of field using the contrast settings. Apart from the pre-production settings, you can use these post-production techniques to make your images less blurry and more appealing.
Now that we’ve understood the factors contributing to blurry images & what you should do, let’s put this into practice and see how to make a picture less blurry using a Smartphone:
You can use Snapseed on IOS and Android:
+” icon and select the picture from the gallery you want to deblur.Tools at the bottom of the app and select Details.Structure Slider to enhance mid-tone contrast.Export & check your photos for the reflected results.Similarly, you can use Lightroom, Photoshop, Picsart, and other available apps to blur your images and make them more appealing to the eye.
You can easily manipulate a photo and deblur using desktop apps like Adobe Photoshop; here’s how:
Ctrl + J or Cmd + J for Mac. This way, you can preserve the original image and manipulate the duplicate.Filter > Sharpen > Smart Sharpen. This will make the image sharp and radial.
We hope you’ve understood by now how easy it is to determine why your photos are blurry and unblur your image using unblur. If you have any questions regarding the same, please contact us; we’ll be happy to help. Till then, happy editing!


