By Suneha
How To'sDrawing people can be a challenging task. If approached properly and systematically, it becomes a lot easier. In this blog, we'll guide you through an easy step-by-step process on how to draw people.
One of the easiest ways to draw people is to follow the "Ball and Socket Technique," where the artist draws or sketches out several conjoined ovals to create different body parts of a human. Having a guideline is, therefore, very helpful in drawing complex figures of people.
To start drawing people, gathеr thеsе matеrials bеforе you bеgin:
1. Drawing papеr or skеtchbook
2. Pеncils (HB, 2B, and 4B for different tonеs)
3. Erasеr
4. Sharpеnеr
5. Ruler
6. Pen (to trace over the guidelines and shapes)
Check out SketchMyPic
Drawing portraits of a people when you only have a white sheet of paper and materials can be intimidating. However, with proper planning and execution, you can make the process easier for yourself.
Step 1: Get a reference for your portrait
Start by clicking a picture of the person you want to sketch a portrait of. Get a photograph printout and analyze the facial features: the eyes, nose, facial muscles, mouth, lips, hair, and ears.
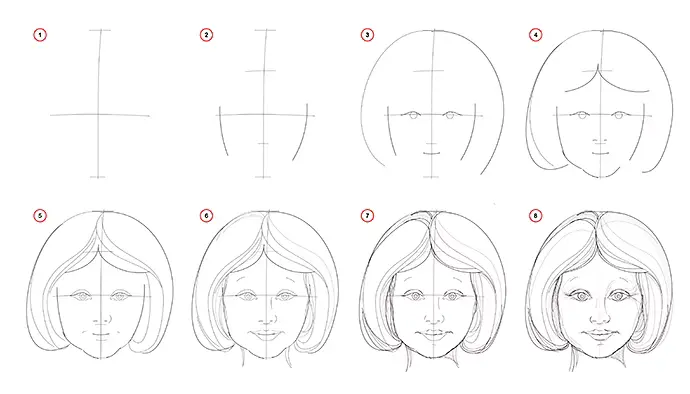
Step 2: Draw your guidelines
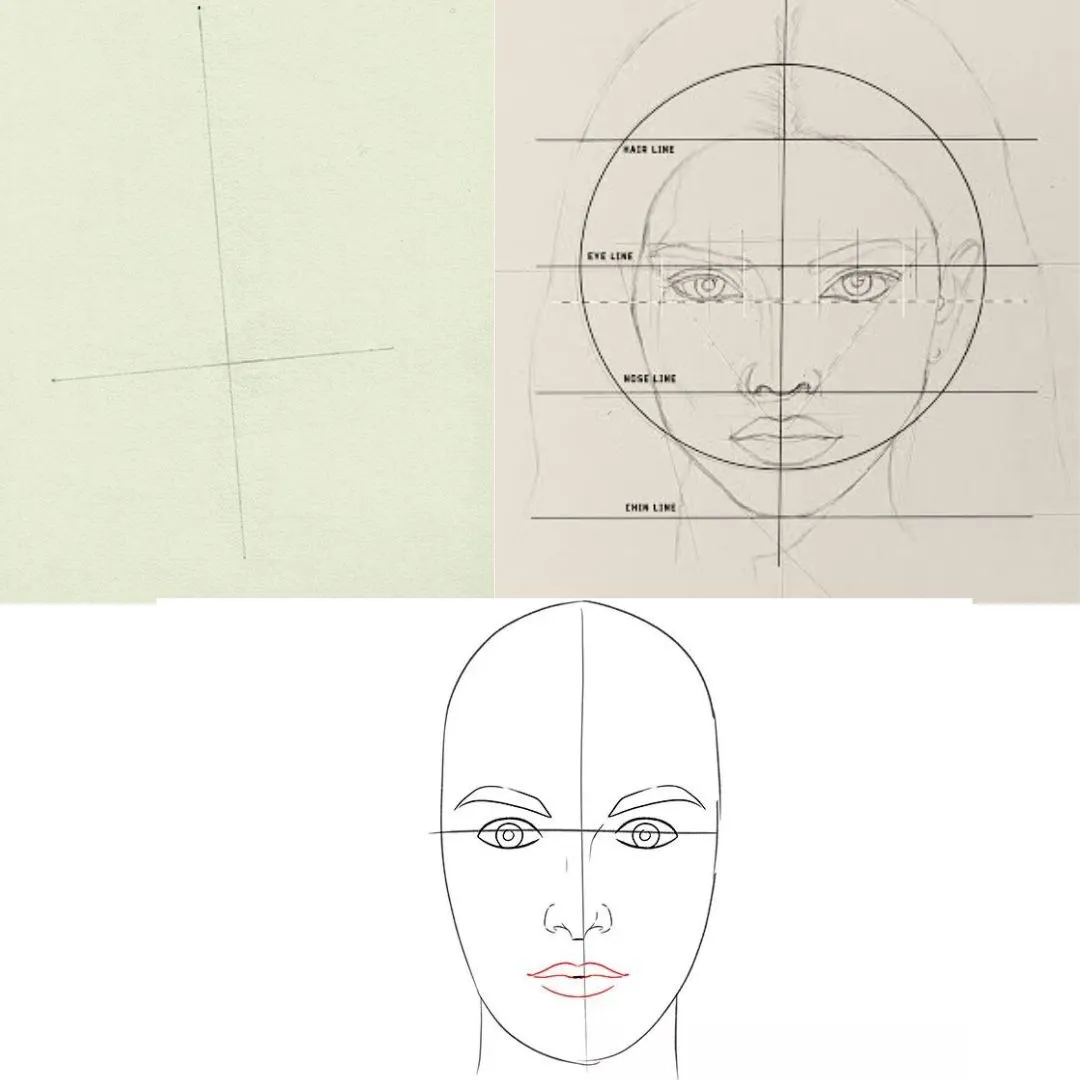
Every artist has a different way of approaching their sketches. Some use grid lines by referring to the printed photo and creating grid lines as a guideline to outline the whole face, while others do it without following that technique. To draw the guidelines, use the photo as a reference and draw two lines (horizontal and vertical).
The horizontal line is to be drawn through the center of the eyes, dividing both the eyes into lower and upper halves. The vertical line is drawn from the center of the chin, in between the eyes, to the top of the head.
Your guidelines are ready.
Step 3: Drawing the face and hair
Dividing the face into four quarters across the two axis lines, start outlining the head using soft lines. Once you find that the shape is fine, proceed with the next step. The guidelines come in handy to understand the position of the different facial features. Complete this stage by sketching the outline of the hair, using the vertical line as a point of reference.
Step 4: Start drawing the features of the face
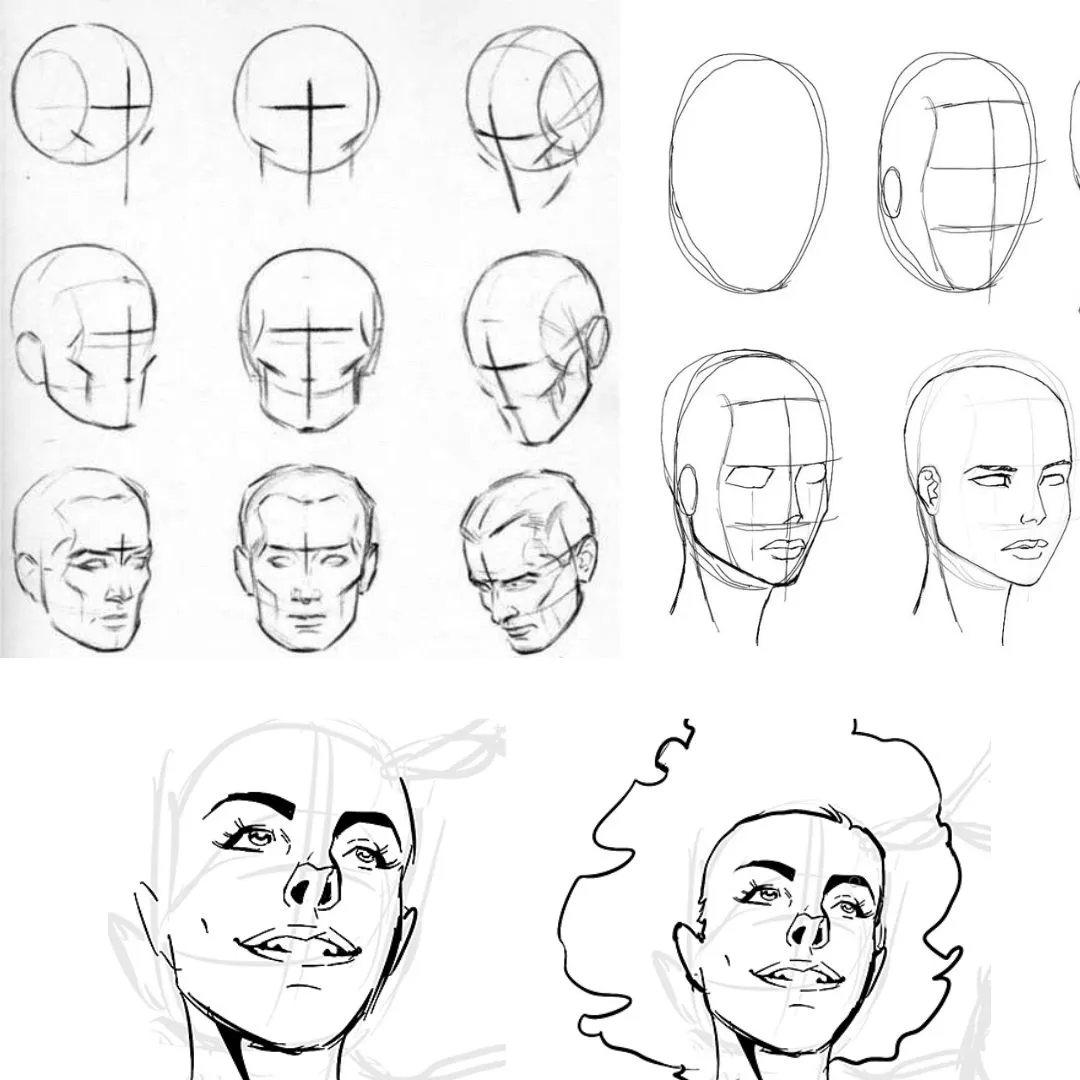
Using the guidelines, you can lightly start drawing the eyes, eyebrows, nose, and mouth. We know that the horizontal line that divides the eyes from the center is the place where the eyes are situated. Refer to the printed photo in case you need clarification. Calculation is critical to drawing portraits.
Step 5: Shading and contouring
Until now, the sketch has been light to outline the portrait and get a proper idea of what is to be done. This is done to make the artist confident in their work. Once the above steps are completed, start using your 4B or 6B pencils and sketching your portrait to add more texture and depth to your drawing.
Step 6: Complete sketching the hair
Complete the sketch of the hair after drawing some tones and shades on your face. Note that the sketching of the hair should be darker than your face. Ensure you have the correct color tone for the hair, as this enhances your drawing.
Step 7: Additional changes
Once you're done sketching the hair and facial features, you can check if you need to add anything more to your portrait. You can add more shading if the depth has not been achieved.
Also, check out: How To Draw A Fish
In this section of the guide, we will show you how to draw facial expressions of people. Drawing expressions is a very complex concept, as you will have to study multiple people to understand the depth of emotions. It is necessary to study the facial muscles and how they change when different expressions are made. On top of that, every person expresses themselves in different degrees.
Step 1: Draw the guidelines for the face
Start by making the guidelines of the face and head as we had discussed in the above section.
Step 2: Study the muscles and facial features
Using a reference picture, study the features of the face. Check how different emotions are seen when there are changes in the facial muscles.
Step 3: Practice
The key to achieving a great sketch is to keep practicing. Practice different facial gestures, changes in the face when the facial muscles change, work on shading and contouring, etc., and pay attention to details and their positions, such as the eyebrows, eyes, pupils, etc.
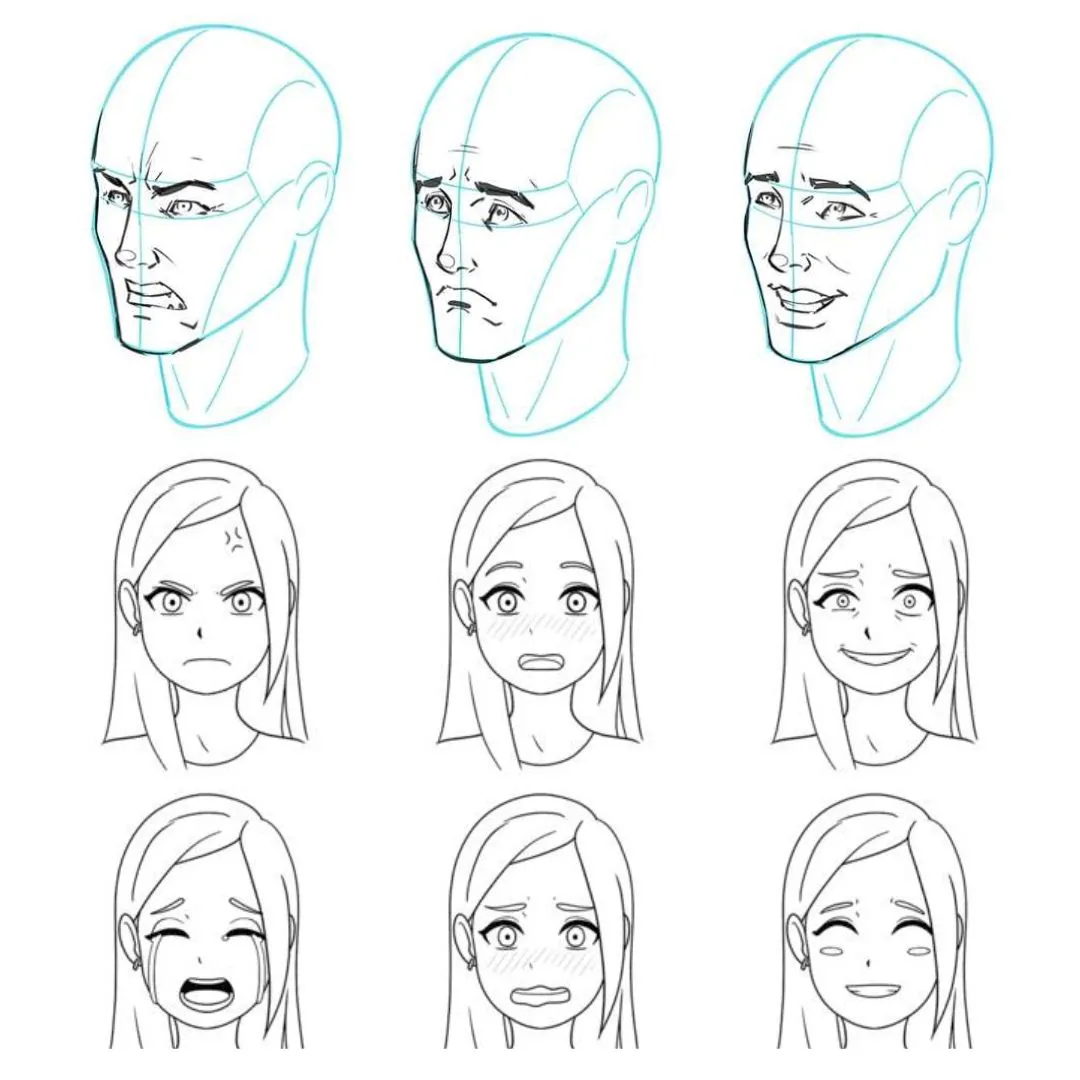
Here are a few expressions that you can draw:
Happiness: Happiness is characterized by arched eyebrows and the corners of the mouth are pulled up. The furrow of the skin from the top wing of the nose to the corner of the mouth is pulled up. The cheeks puff and rise, and the eyes narrow while the face looks lifted.
Sadness: The inner ends of the eyebrows are raised and drawn closer to each other. Wrinkles appear on the forehead, and the mouth is pulled down, depicting the 'long face'.
Fear: When a person is terrified, the brows are raised and drawn closer to each other. Wrinkles appear throughout the forehead, and the mouth remains open. The lower face widens, creating rigid folds around the neck.
Anger: To show anger, the facial muscles pull the eyebrows down. The nostrils appear flared, and the mouth is open, showing gritted teeth.
Check out: How To Draw A Sunflower
img source: Adobe Stock
We hope that the blog was helpful to you. Drawing people can be a tedious task if you need to know where to start. Start from the basics of using a guideline and slowly proceed forward. Remember, consistent practice is the key to improvement, so do not be disheartened if the first few tries do not turn out well. Happy Drawing!


