
By Suneha
Guide

image source: Pinterest
Photography and photo editing is a diverse activity. Film Photography is used by many photographers to filter and edit their photo textures to create a classic visual. One of the ways people can add textures is by making the photo look grainy. Through this detailed guide, we present to you how to add film grain to a photo.
When we talk about grain, we refer to something called noise. In photography, digital noise is basically random pixels that remain scattered over the photo, producing a grainy effect.
All camera sensors create noise, the higher the sensitivity of the sensor, the more visible the texture appears.
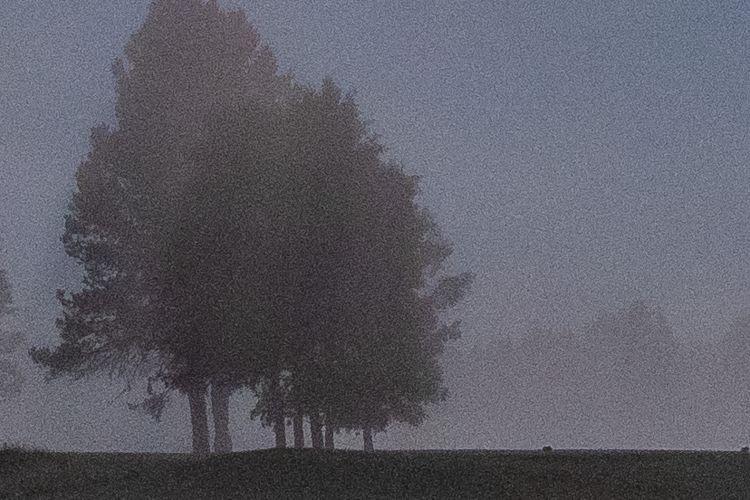
image source: SLR Lounge
Adding a grain texture to your picture can make it look bold and vintage. However, you should know when to add the filter and for what photos.
1. Portrait photography - Adding film grain to your photos is an easy way to edit portraits. It creates a classic, calming effect on the portrait shots to make it look more colorful and vibrant.
In monochromatic portraits, the grain filter really stands out and makes the portrait look more beautiful.
2. Black and white photography - Grain textures look great in black and white photos.
Most of the time, photographers and editors try to reduce the noise of an image. In some exceptional cases, noise or film grain is added creating a vintage effect to impart a certain emotion to the picture.
Here, is a detailed step-by-step tutorial on how to add grain to a photo in Photoshop.
Step 1 - Add a New Layer- After launching Photoshop, upload your image and create a new layer and use the Overlay mode and select Fill with Overlay neutral color option.
Step 2 - The Overlay option basically creates a gray layer on top of your image which you cannot see thanks to the Overlay blend mode.
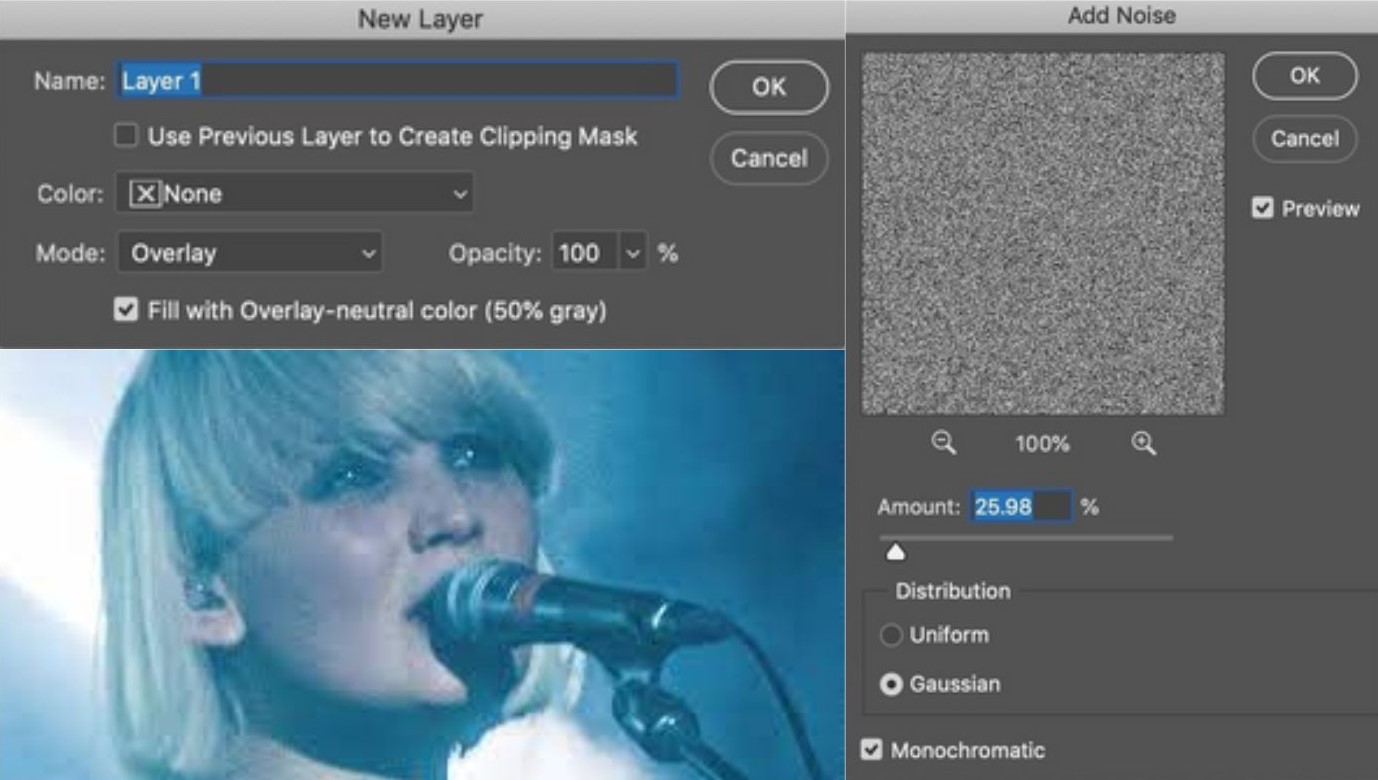
Step 3 - Add Noise- Open the Filter tab and select Noise. Click on the Add noise button and ensure that the distribution is set to Gaussian and tick the Monochromatic option.
The Monochromatic ensures that the grain does not have color and the Gaussian distribution randomizes the grain distribution, making the pattern unpredictable.
Step 4- You can drag the slider to change the amount of grain you add to your image.
You can also transform the gray layer into a smart object before applying grain to your images. You would be able to change the amount later.
To create a smart layer, right-click on the layer from the Layers panel and select Convert To Smart Object.
We hope the guide was easily navigable!
Fotor is a great application for photo editing. It has multiple features, filters, and photo editing techniques which come in handy for everything.
Here’s how to add grain to a photo using Fotor.

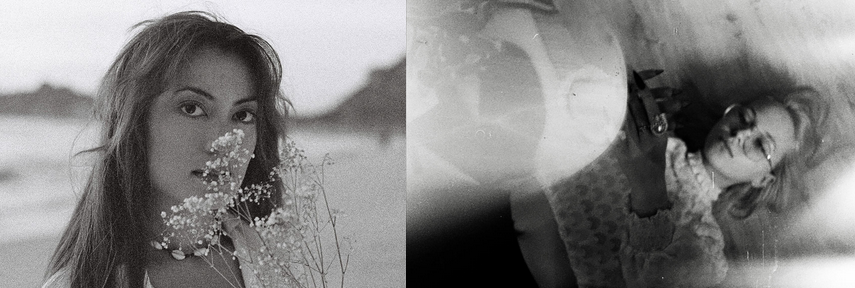
image source: BeFunky
Step 1- Open Fotor.
Step 2- Click on the option Add film Grain now and upload the photo that you want to add the grain filter.
Step 3- Select the option Film Grain on the left menu.
Step 4- Slide intensity and roughness as per your needs to get the desired grainy result that you want in your photo. Click on Apply.
Step 5- Download the photo in JPG or PNG format.
The Grain filter on Fotor helps enhance the details to create a grainy texture for your photos. It creates a visually appealing look for your photo and is quite easy to use.
Fotor is a free online photo editor which is navigable and beginner-friendly.

Here’s how to add grain to a photo using BeFunky, a widely used photo editing website.
Step 1 - Open BeFunky.
Step 2 - Upload your designed photo using the Open Tab.
Step 3 - Select the Effects Tab in the left-hand menu and click on Cinematic.
Step 4 - Customize your image to your liking. Once completed, click on Apply or head to the Settings tab to make adjustments.
You can adjust the intensity in your settings and change the exposure to create a more impactful look.
Step 5 - After getting the desired look, save your photo.
It is very easy to add grain to a photo on your phone as there are multiple apps that provide a wide variety of vintage filters and options. Here’s how to add grain to a photo on your iPhone using Snapseed (Snapseed is available on iPhone and Android).
Step 1 - Download Snapseed and launch it.
Step 2 - Tap on the plus icon in the middle of the screen. You can also click on Open in the top-left corner.
Step 3 - Upload the Picture you want to add grain to.
Step 4 - Click on Tools and tap on Grainy Film.
Step 5 - You can choose a filter with your grain texture that you find visually appealing or best-looking.
Step 6 - After adding your filter, go to Adjustments and adjust the amount of grain and then click on the checkmark to apply.
Step 7 - After you are done editing, click on Export and choose any of these options: Save, Save a Copy, or Export.

Using the grain effect in moderate quantities is a great way to beautify your pictures. It has several uses which make the photo look visually appealing to the spectators.
1. Grain effect gives a vintage look - Adding grain to your photos can be visually appealing in creating a classic and vintage look.
Grains have been present in the field of photography since its dawn. So, when modern pictures are taken and a grainy texture is added to them, it looks like an ‘old-timey’ picture.
This can be used on modern images to create an old and vintage look.
2. Grain solves color banding - Color banding is a form of posterization that can be seen in digital images. It occurs when an abrupt color change cannot be represented accurately, resulting in a banded and pixelated appearance with a discontinued look.
The more adjustments are made, the higher the chance of color banding. Grain is a great way to reduce the banding as it can blend the harsh transitions between tones and pixelated discontinuities.
We hope the How To Add Grain To A Photo was useful for you in increasing your photo editing knowledge and expanding your photographic techniques.


