By Jinee
How To'sDrawing a nose can be a fascinating and challenging aspect of artistic expression. Noses come in a variety of shapes and sizes, and capturing their unique features requires a blend of observation, understanding of anatomy, and skillful technique. Whether you're a beginner looking to learn the basics or an experienced artist aiming to refine your nose-drawing abilities, this step-by-step guide will help you navigate the intricate process of drawing a nose. From understanding nasal anatomy to capturing intricate details and expressions, let's embark on an artistic journey to master the art of drawing noses.
Materials Needed
Before you begin drawing, gather the following materials:
1. Drawing paper or sketchbook
2. Pencils (HB, 2B, and 4B are recommended for different tones)
3. Eraser
4. Sharpener
5. Blending tool or tissue (optional for shading)
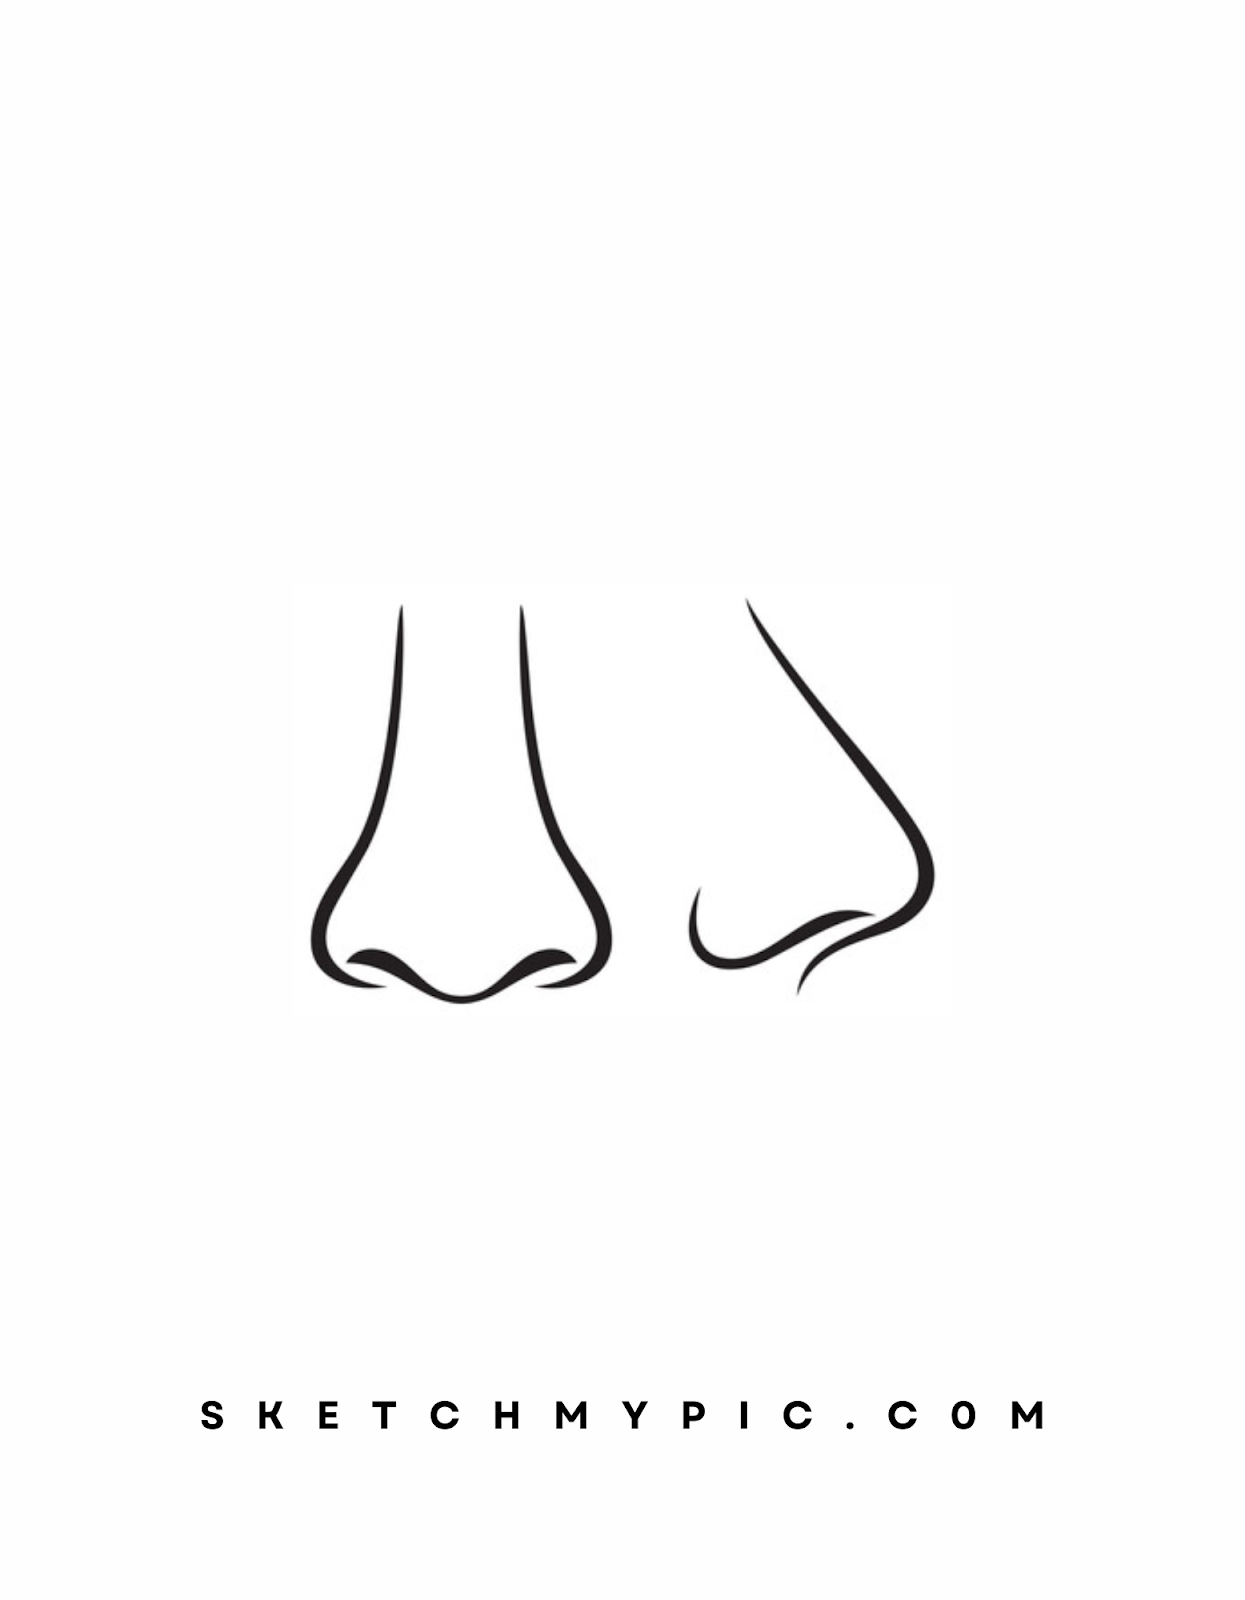
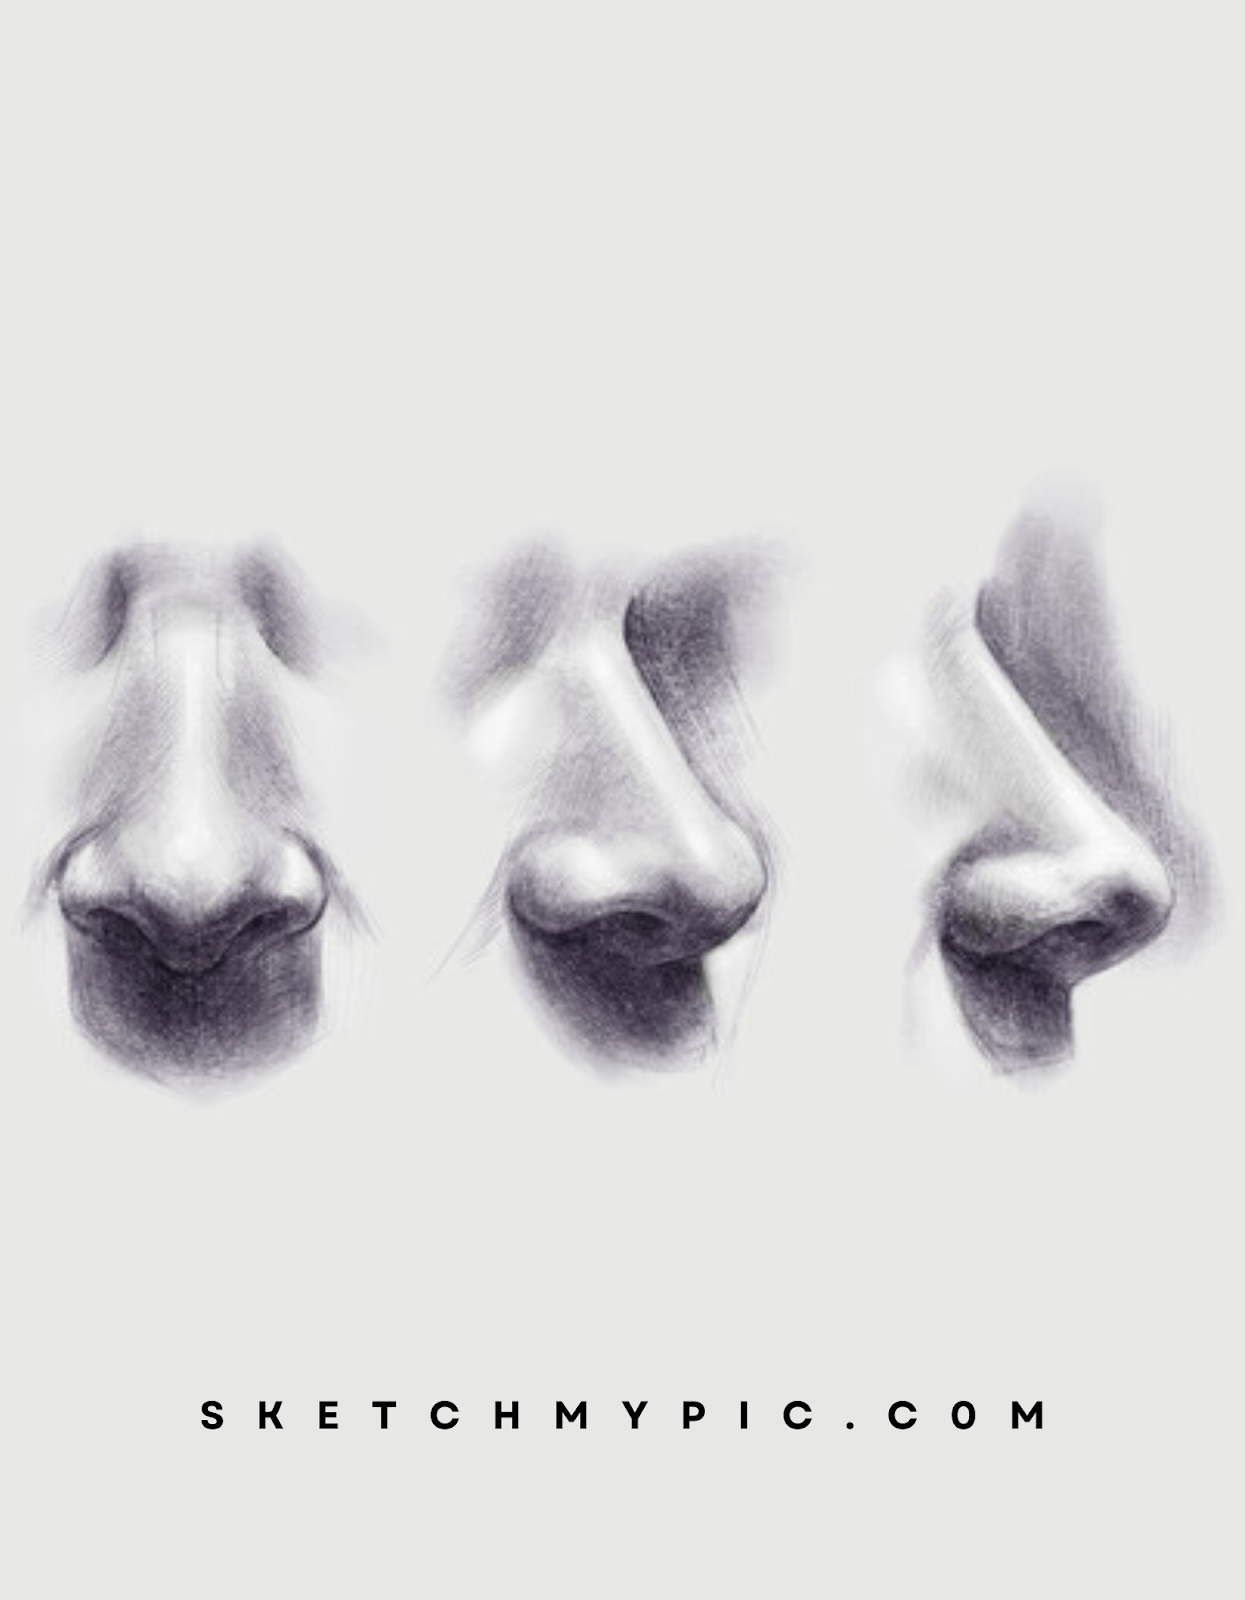
Step 1: Understanding Nasal Anatomy
The first step in drawing a nose is to understand its anatomy. The human nose consists of several components, including the bridge, nostrils, tip, septum, and alar crease. Familiarize yourself with these elements through reference images or studying your own nose in the mirror. This understanding will help you create realistic and accurate nose drawings.
Step 2: Basic Nose Outline
Begin by drawing a simple guideline for the nose. Draw a vertical line that represents the center of the face, and then sketch a small triangle shape at the bottom of the line. This triangle will serve as the foundation for the nose's bridge, nostrils, and tip. Keep the triangle's proportions in mind to match the desired nose size.
Step 3: Defining the Bridge and Nostrils
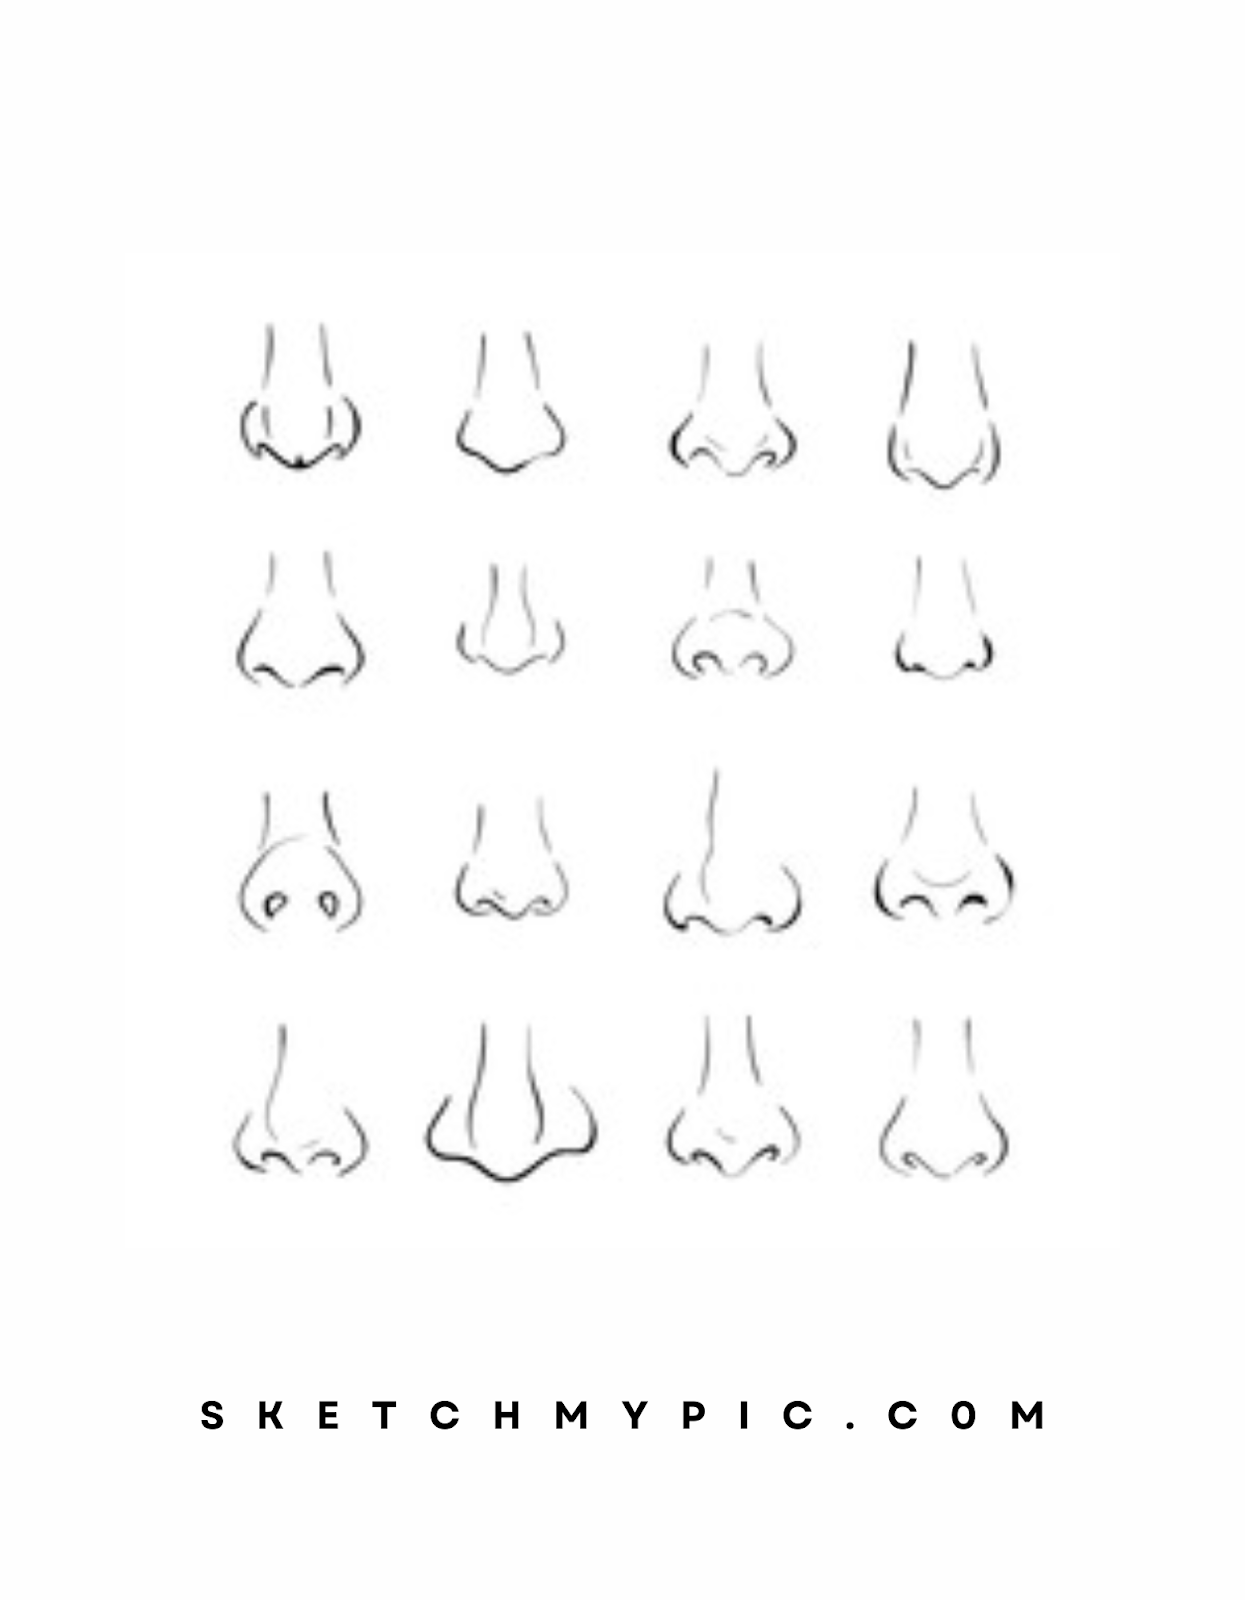
Within the triangle, sketch the bridge of the nose. This is the raised area that extends from the forehead to the tip. Next, draw the nostrils on either side of the triangle's base. Nostrils can be different shapes, sizes, and angles depending on the person's profile. Observe reference images to understand the variations.
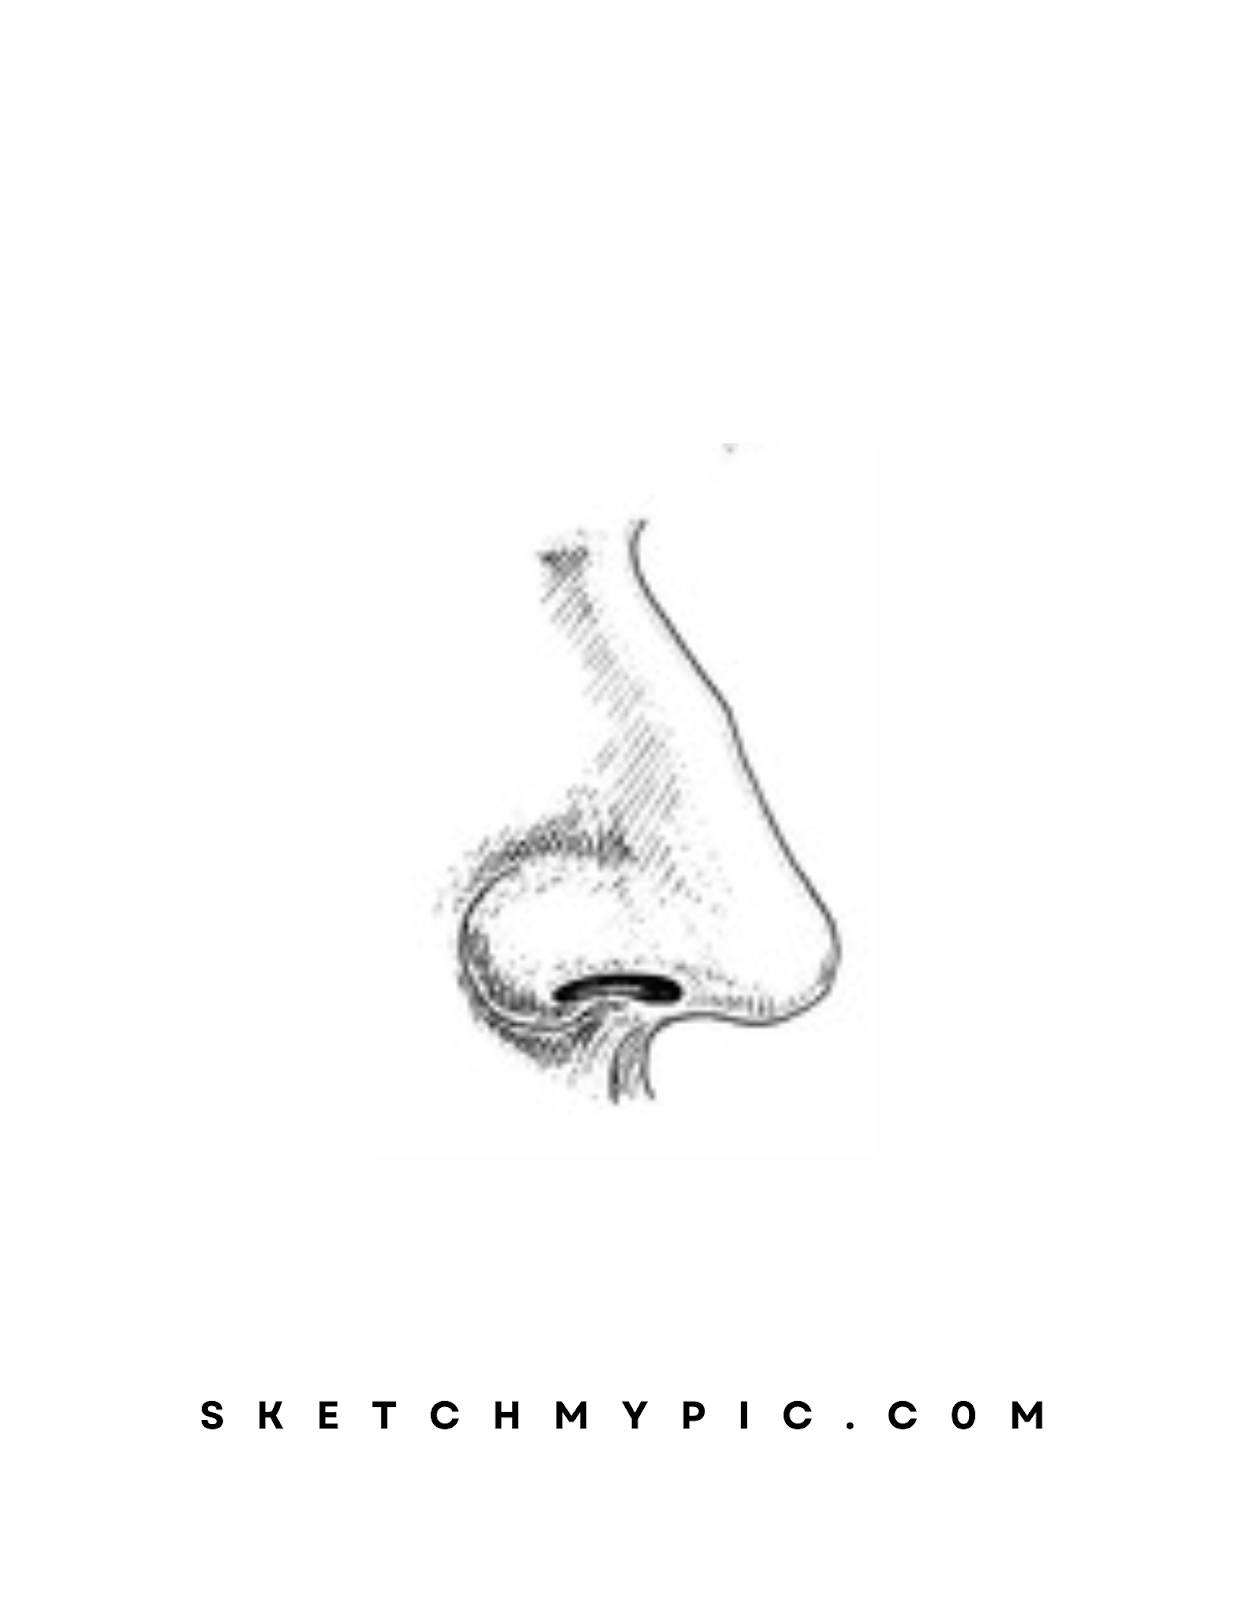
Step 4: Shading to Add Depth
Shading is crucial to give your nose drawing depth and dimension. Determine the direction of the light source and imagine where the shadows would fall. Use your 2B or 4B pencil to shade the areas away from the light source, such as the sides of the bridge and the creases between the nostrils and the cheek.
Step 5: Detailing the Tip and Septum
Moving on to the nose's tip and septum, refine the shapes with attention to detail. The tip of the nose can be rounded, pointed, or even slightly bulbous. The septum is the area that separates the nostrils. Capture the subtle curves and angles that give the nose its unique character.
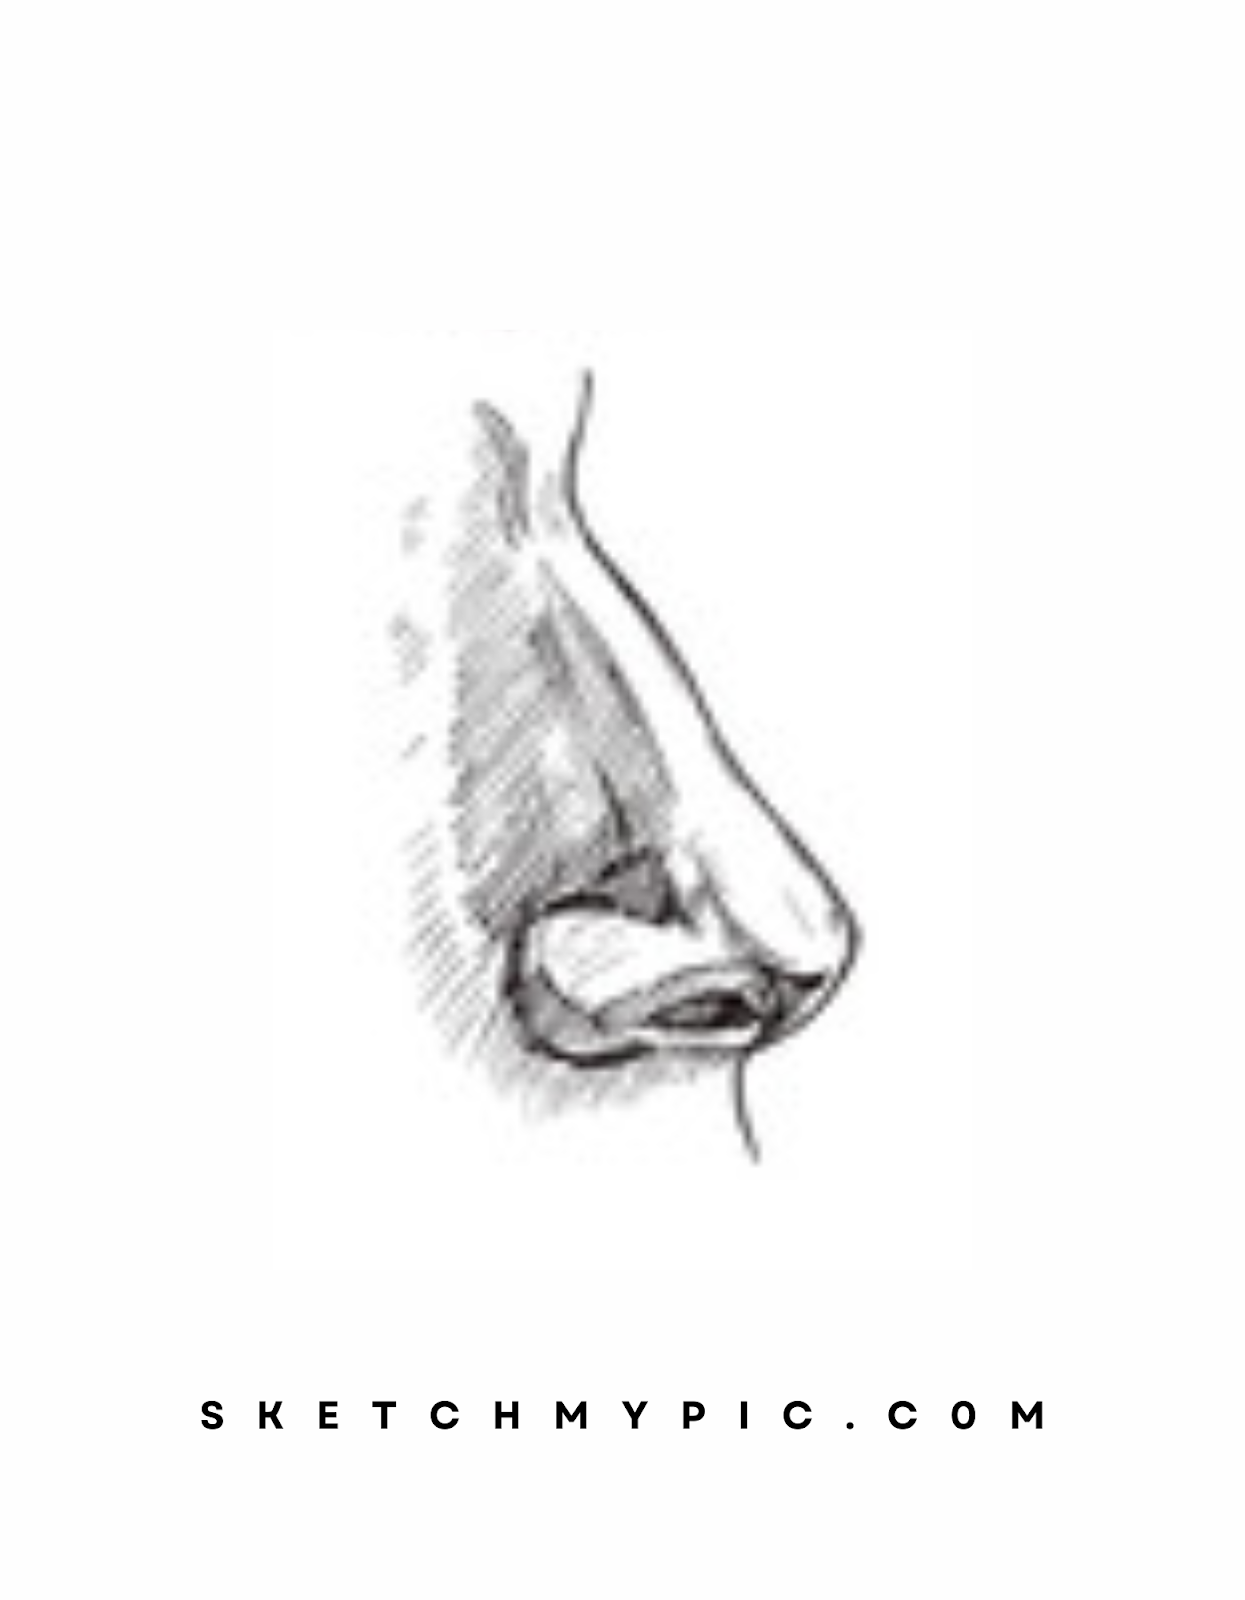
Step 6: Adding Texture and Shadows
To create a realistic appearance, add texture to the nose's surface. Use your pencil to add light strokes or dots to mimic the skin's texture and pores. Additionally, enhance the shadows by adding darker shading to areas where the skin curves away from the light source.
Step 7: Capturing Expression
Noses play a significant role in conveying facial expressions. The angle, tilt, and shape of the nose can influence the overall mood of the drawing. Pay attention to how the nostrils flare or compress with different expressions. A slight change in the nose's positioning can alter the entire facial expression.
Step 8: Blending and Smudging
Use a blending tool or your fingertip to gently blend and smudge the shading. This technique softens the transitions between light and shadow, creating a more realistic and natural look. Be cautious not to over-blend, as some texture and contrast are essential for a convincing nose drawing.
Step 9: Final Touches
As you near completion, take a moment to review your nose drawing and make any final adjustments. Ensure that the proportions are accurate, the shading is well-balanced, and the overall nose looks visually appealing. Pay close attention to small details and refine any areas that need improvement.
Adding Life with Color: Coloring Your Nose Drawing
Coloring your nose drawing is a pivotal step that infuses vitality, realism, and dimension into your artwork. Adding color to the nose allows you to convey skin tones, texture, and nuances that make each nose unique. Whether you're aiming for a natural flesh tone or exploring imaginative color palettes, follow these steps to breathe life into your nose drawing:
Step 1: Selecting Your Color Palette
Before you begin coloring, decide on the skin tone or color palette that suits your artistic vision. For a realistic representation, observe reference images to match the skin tones of your subject accurately. Consider using colored pencils, markers, watercolor paints, or digital coloring tools, depending on your preferred medium.
Step 2: Coloring the Base Tone
Start by applying the base color to the nose. Use light, even strokes to cover the entire nose area with the chosen skin tone. If you're using colored pencils or markers, layering multiple shades of the same color can help you achieve realistic variations in skin tone.
Step 3: Adding Shadows and Highlights
Shading is essential to create depth and dimension in your nose drawing. Determine the direction of the light source and imagine where the shadows would naturally fall on the nose. Use a slightly darker shade of your base color to add shadows to areas such as the sides of the bridge, under the nostrils, and where the nose meets the face.
For highlights, identify the areas that would catch the most light, such as the bridge's tip and the upper surface of the nose. Use a lighter shade of your base color or even a touch of white to add highlights and enhance the three-dimensional appearance of the nose.
Step 4: Enhancing Texture
To make your nose drawing more realistic, add texture by using short, light strokes or dots. This technique mimics the natural texture of skin, creating a sense of realism. Apply these strokes strategically, following the contours and curves of the nose. Focus on areas that are more textured, such as the sides of the bridge and the nostrils.
Step 5: Blending and Smudging
To achieve a smoother transition between colors and tones, consider blending and smudging your colors. Use a blending tool, a tissue, or your fingertip to gently blend the colors together. This technique softens harsh edges and creates a seamless look.
Step 6: Capturing Subtle Details
Subtle details contribute to the authenticity of your nose drawing. Pay attention to minor variations in color due to blood vessels or imperfections on the skin. Use a fine-tip pencil or a slightly darker shade to add these nuanced details in a controlled manner.
Step 7: Finalizing the Expression
Take a moment to review your colored nose drawing and assess if the expression matches your intent. Adjust shading, highlights, and color variations to enhance the mood and character of the nose. Be mindful of how the coloring interacts with the nose's contours and curves.
Step 8: Experimenting with Creative Palettes
If you're exploring imaginative possibilities, don't hesitate to experiment with unconventional color palettes. You might choose to portray a fantasy creature with vibrant colors or create an abstract interpretation of a nose. This step is an opportunity to express your creativity and showcase your unique artistic voice.
Step 9: Final Touches
As you approach the completion of your colored nose drawing, take a step back to evaluate your work. Ensure that the colors are well-blended, the shading is coherent, and the overall nose looks visually captivating. Fine-tune any areas that require adjustment.
Conclusion
Drawing a nose is a rewarding journey that allows you to capture the intricate details and nuances that make each face unique. By understanding nasal anatomy and following the step-by-step guide, you can create noses that are both realistic and expressive. Embrace the opportunity to experiment with different angles, shapes, and expressions to showcase your artistic prowess. Drawing noses enables you to convey emotion, tell stories, and celebrate the beauty of human diversity. So, pick up your pencils, immerse yourself in the world of noses, and delight in the art of creating realistic and captivating nose drawings!